Please leave a little thank you...

If you do any of my tutorials could you please leave me a little message in the shoutbox i would like to hear what you think of them also would love to see your results you can email them to me my email addy is at the bottom of my terms of use.. thanks...

Thursday, February 26, 2009

Lana'a Tutorial "Grunge Babe"...


My result from Lana's tutorial Grunge Babe
you can find the tutorial HERE
thanks Lana for an awesome tutorial...


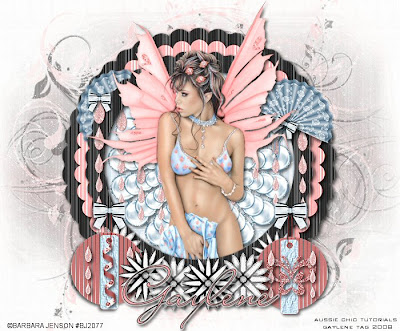
Monday, February 23, 2009

It's a Magical Day....


click tag for full size...

This tutorial was written by me on February 24th 2009
Any similarity to any other tutorial is purely coincidental
This tutorial was written in pspx but should work in other versions.

Tools needed
Tube
Scrap-kit
Mask

Scrap-kit FTU Magical Day from Seachell's Scrapz
Download HERE

The tube I am using is from Al Rio
You can purchase HERE

The mask I have used is suzzanna_mask 32
Download HERE

Put the mask in your psp mask folder
Open new white image 700x580
Copy and paste paper 10 as new layer
Layers, load, save mask from disc, find the mask, load
Layers, merge group
Copy and paste element 7 as new layer
Layers duplicate
Copy and paste element 9 as new layer
Move down a little see my tag for reference
Add slight drop-shadow
Copy and paste tube of choice as new layer
Place where desired see my tag for placement if you want
Add drop-shadow
Now duplicate element 9
And with eraser tool erase till you get the tube looking like mine
But be careful as it's a bit fiddly
Make element 9 layer active the original layer not the duplicated layer
Copy and paste element 5 as new layer
Move slightly to the left, now duplicate, image mirror
Add what other elements you want on your tag
I assed a few sparkles to my tag also
Drop-shadow as you go
Add your name and any copyrights to your tag
Layers, merge all
Save
Thanks for doing my tutorial
Gaylene
xox

Wednesday, February 18, 2009

Endless Look..........


click tag to enlarge...

Endless Look..

This tutorial was written by me on February 19th 2009
Any similarity to any other tutorial is purely coincidental
This tutorial was written in psp8 but should work in other versions.

Tools needed
Tube
Scrap-kit
Mask

The tube I am using is from Barbara Jenson
TOU apply, purchase HERE

Scrap-kit Black and White freebie from Sharon Kay's Place
Download HERE

Mask I have used is called SL_NewEonSabreMask
Download HERE

Put the mask in your psp mask folder

Open new white image 700x580
Copy and paste paper 11 as new layer
Layers, load save mask from disc find Sabre's mask, load
Layers, merge group
Using your deform tool pull the mask out so it fits the whole of your image
Layers, duplicate
Open paper 7 in psp, Adjust, Hue & Saturation, Colorize
Put H&S on 255, click ok
Copy and paste as new layer
Apply the mask again, image resize 110% 2 times
Layers, duplicate
Open frame 1 in psp, colorize the same settings as the mask
Image resize 110% all layers not ticked
Copy and paste frame 2 as new layer
Open paper 10 in psp Adjust, hue and Saturation, colorize
Hue...146
Saturation...105
Click ok
Make the top layers active and click inside the frame with magic wand
Selections, modify, expand by 4
Layers, new raster layer,copy and paste paper 10 into selection
Select none
Drag this layer under the top frame layer
Copy and paste Pearlbroach 1 as new layer
Image resize 110%
Colorize if you want
Add drop shadow to frame layers and the pearbroach
Copy and paste tube of choice
Place where desired, add dropshadow
Copy and paste what elements you want to use as new layers
Colorize if you want, add slight drop-shadow to each layer
And sharpen if you want to
Add some sparkles to the mask layers if want
Add any copyrights and your name
Layers, merge all
Save
Thanks so much for try out my tutorial
Gaylene
....


Sunday, February 15, 2009

Eire....


Click on tag to see full size..

This tutorial was written by me on February 16th 2009
Any similarity to any other tutorial is purely coincidental
This tutorial was written in pspx but should work in other versions.

Tools needed
Tube
Scrap-kit
Mask (sg_triple-deco)

Scrap-kit Eire PTU from CBJ Creationz
Purchase from HERE

The tube I am using is a PTU tube from Tom Hoover
You can purchase from HERE

The mask is from Essex Girl download HERE
Its on page 30

Put the mask in your psp mask folder

Open new white image 700x580
Copy and paste paper 10 as new layer
Layers, load save mask from disc find sg_triple-deco mask
Load, layers, merge group
Adjust, blur, gaussian blur put radius on 10 click ok
Effects, texture effects, straw wall
Leave settings as they are but put the colour on #D2D2D2 click ok
Now copy and paste paper 8 as new layer
Add the mask again then image resize 95%
Copy and paste your tube and place like mine
Add drop-shadow
Make the white background layer active
Copy and paste beautiful arche as new layer
Place to the left of your tag, image duplicate, image mirror
Now with eraser tool erase some of the arche in the middle
Make the top layer active
Copy and paste what elements you want on your tag
Adding a slight drop-shadow as you go
Sharpen if you want to also
Add your name and any copyrights
Layers merge all
Save

Thanks for doing my tutorial
Gaylene...

Friday, February 13, 2009

Only Time Tutorial...


Click on tag for full size...

Only Time..

This tutorial was written by me on February 14th 2009
Any similarity to any other tutorial is purely coincidental
This tutorial was written in pspx but should work in other versions.

Tools needed
Tube
Scrap-kit
Mask
Background of choice
Word-art

The tube I am using is a freebie from Barbara Jenson
TOU apply download HERE

Scrap-kit Only Time FTU from Pam's Scrapping Place

She has deleted her blog but will leave the tutorial here
maybe you can use another scrap-kit

Mask WSL_Mask 117 download HERE

Put the mask in your psp mask folder


Background of choice

The word-art i have used i don't remember where i got it from
if it's yours please let me know and i will give you the credit for it

Download HERE

Open new white image 700x580
Open paper 4 in psp, image resize 50% 2 times all layers clicked
Make your white image active
Selections, select all, layers new raster layer
Copy and paste paper 4 into selection, select none
Layers, load save mask from disc, find WSL_Mask 117 load
Layers, merge group
In elements 3 find the scollop mat open in psp
Image resize 522 x 526 pixels
Copy and paste as new layer
Open curled ribbon 2 in psp, image resize 522 x 578 pixels
Copy and paste as new layer, resize 95 %
Drag this layer under the scollop mat layer
Click on the scollop mat with magic wand,
Copy and paste background of choice as new layer
Effects, illumination effects, sunburst,
Colour white everything else leave as is click ok
Selections, none
Add drop-shadow to layers above
Click on your mask layer and with eraser tool erase the pink from the eyelets
Do the same with your background layer but be careful erasing on this layer
Copy and paste the word-art as new layer
I used grandient glow on mine and drop-shadowed it
Copy and paste your tube of choice as new layer
Add drop-shadow
Now copy and paste what elements you want on your tag
You will have to resize them
Add drop-shadow as you go and sharpen if you want
Add your name and any copyrights
Layers, merge all
Save
Thanks for doing my tutorial
Gaylene xox


Sunday, February 8, 2009

So Angelic..


So Angelic..

This tutorial was written by me on February 9th 2009
Any similarity to any other tutorial is purely coincidental
This tutorial was written in pspx but should work in other versions.

Tools needed
tube
Scrap-kit
Mask... WSL_Mask 192

Plugin...Tramages... Tow the Line (optional)
Xenofex... Constellation

I am using a Rachel Tallamy tube
As this is a PTU tube you must have a licence
Purchase from HERE

Scrap-kit Angelic PTU from Jo purchase below

Creationz by Jo

Mask WSL_Mask 192 from Chelle

Download HERE


Put the mask in your psp mask folder


Open new white image 700x580

Copy and paste paper 4 as new layer

I colourized mine to match my tube settings below

Adjust, hue & saturation,colorize

hue...153

saturation...44

Click ok

Layers,load save mask from disc find WSL_Mask 192, load

Layers, merge group

Move the mask to the top left, layers duplicate, image mirror

Layers duplicate, image flip, layers duplicate image mirror

Merge all the mask layers visible

Layers duplicate, make the bottom mask layer active

Effects, Tramages, tow the line

Use default settings click ok

Copy and paste bracket 1 as new layer

Image resize 105%, colourize to match your tube if you want

Copy and paste frame 2 as new layer, resize 70%

Image mirror

Now copy and paste frame as new layer

Image resize 60%

Make the frame 2 layer active, and duplicate it

Now drag it above the frame layer

Using your eraser tool erase some of the frame

See my tag for reference

Copy and paste tube of choice as new layer

Place on the frame like I have

Add drop-shadow to your frame layers and tube

Sharpen also if you want

Now copy and paste what elements you want on your tag

Add slight drop-shadow and sharpen

Add any copyrights and your name

If not going to animate layers merge all

Save

ANIMATION

Make the bracket 1 layer active

Effects,Xenofex 2 constellation

Settings below
Star size 2.00
0
1
1
100
85
Twinkle rotation 45
Keep original image ticked
Click ok
Copy merge and paste in AS as new animation
Back to psp
Undo the twinkles
Now do the twinkles again but hit the random seed once
Copy merge and paste in AS after current frame
Do above one more time so you have 3 frames in AS
Edit, select all
Animation, frame properties, change to 15
Click ok
Save
Thanks for doing my tutorial
Gaylene
Xox


Thursday, February 5, 2009

Adorable Lolita..


Click on tag to see full size

This tutorial was written by me on 6th February 2009
Any similarity to any other tutorial is purely coincidental
This tutorial was written in psp8 but should work in other versions.

Tools needed
Tube
Scrap-kit

Plugin..dsb flux, bright noise (optional)
Cybia...Mezzy

No supplies for this tutorial

Mask I have used is WSL_Mask 116
Download HERE


Put the mask in your mask folder is psp

Scrap-kit Lolita PTU from Mar
You can purchase the scrap-kit HERE

The tube I have used is from Barbara Jenson
You must have a licence to use her tubes
You can purchase the tube HERE

This tutorial is a bit fiddly to do there is a bit of erasing

Open new white image 700x580
You can resize later if you want to
Open paper 11 in psp, selections, select all
Layers, new raster layer, copy and paste the paper into selection
Select none
Layers, load save mask from disc, find WSL_Mask 116 and load
Layers merge group
Effects, Cybia Mezzy settings below
Click on the little arrow up top and change it to Rusty
Leave the settings as is then click ok
Open Mar 21 in psp the frame resize 60%
Copy and paste as new layer
Open Mar 11 in psp and resize 80%
Copy and paste as new layer
Duplicate Mar 21 layer and drag this layer above Mar 11 layer
With eraser tool erase what parts of the frame you don't want
See my tag for reference this part is a bit fiddly
Especially around the flower so be careful
Add drop-shadow to these layers now settings below
V&H...4
opacity...60
blur...7
Black
Copy and paste your tube of choice as new layer
Place where desired and add same drop-shadow as above
Copy and paste what elements you want as new layers
You will have to resize them
Add same drop-shadow as you go
I added some brushed to my tag also and some word-art
Add your name and any copyrights
If you not going to animate layers, merge all
Save

Now for the animation

Make the Mar 11 layer active
Effects, plugins, dsb flux, bright noise
Intensity on 25
Direction on mix
Now click mix once
Copy merge and paste as new animation in AS
Back to psp
Undo bright noise
Add the bright noise again but click mix 2 times
Select none
Copy merge and paste in AS after current frame
Back to psp
Undo bright noise
Do bright noise again but click mix 3 times
Select none
Copy merge and paste in AS after current frame
View animation
If all is ok
Save
Thanks for doing my tutorial
Gaylene
xox

Wednesday, February 4, 2009

Lustful Romance...


Click on tag to enlarge..

Lustful Romance

This tutorial was written by me on 5th February 2009


Tools needed

Tube

Scrap-kit

Mask...Vix_Mask 201


Scrap-kit Lustful Romance PTU from Jo purchase below

Creationz by Jo


Mask from Vixpsp download HERE


Put the mask in your psp mask folder


The tube I have used is PTU you must have a licence

It's a Jennifer Janesko tube purchase HERE


Open new white image 700x580

You can resize it later if you want

Layers new raster layer, selections, select all

Copy and paste paper 11 into selection, select none

Layers, load save mask from disc, find Vix_Mask 201, load

Layers, merge group

Open lace frame 2 in psp,copy and paste as new layer

Image resize 70% all layers not clicked

Copy and paste frame lace frame as new layer

Image resize 60% all layers not clicked

Copy and paste paper 6 as new layer, image resize 50%

Drag below the frame layers, erase and of the paper showing outside of the frame

Now add drop-shadow to both frames settings below

V&H...3

opacity...60

blur...7

Black

Now add the drop-shadow again but change V&H to -3

Copy and paste your tube of choice

Add a drop-shadow with settings above

But do not do -3

Now copy and paste what elements you want on your tag

Add a drop-shadow to them if you want

Add any copyright and your name

Layers merge all

Save


I Heart You...


Click on tag to see full size..

I Heart You

This tutorial was written by me

Please don't claim it as your own and was written in psp8


Tools needed

Tube

Scrap-kit

Mask... Vix_Mask 139


Plugins needed (optional)

Tramages..Tow the line

Xenofex..Constellation

Cybia, Screenworks, Fine-rule


Put the mask in your psp mask folder


The tube I used is from Barbara Jenson

You can get her tubes HERE


Scrap-kit I Heart You PTU from Rachel at Captivated Visions

You can purchase the kit from HERE


You can download the mask from HERE


Open new white image 700x580

Layers new raster layer flood-fill with #68C083

Or you can use a paper of choice from the kit

Layers, load save mask from disc find Vix_Mask 139, load

Layers merge group

Now duplicate the mask layer, image flip

Layers merge down

Duplicate again and make the original mask layer active

Adjust, blur, gaussian blur put radius on 10 click ok

Effects, Cybia, screenworks fine rule mode on 0 click ok

You can add some Xenofex Constellation to both mask layers if want as I did

Make the duplicated mask layer active now

Open heart10 in psp, copy and paste as new layer

Place up top in the middle of your tag

Copy and paste heart 3 as new layer, image rotate free rotate 20 left

All layers not clicked, click ok

Place like mine, layers duplicate, image mirror

Effects, tramages, tow the line settings default

Do the tow the line to the other 2 hearts as well

Drop-shadow the 3 hearts

Add some constellation if you want

Copy and paste frame 11 as new layer

Image resize 80%, image mirror

Place like mine and drop-shadow

Open paper 10 in psp, copy and paste as new layer

Image resize 50% all layers not ticked

Drag this layer under the frame layer

Erase any of the background outside of the frame

Now add what elements you want on your tag

Drop-shadow each layer as you go

Copy and paste your tube of choice as new layer

Drop-shadow

Add your name and any copyrights

Layers merge all

Save

Thanks for doing my tutorial

Hope you enjoyed it

Gaylene

xox

Sunday, February 1, 2009

Twilight Sparkle


This tutorial was written by me
Any similarity to any other tutorial is purely coincidental
This tutorial was written in psp 8 but should work in other versions.

This tutorial is one of my older ones from my other
Tutorial Site

Tools needed

Tube of choice
Scrap-kit
Template

No supplies for this tutorial

Plugin..Jeux de lignes ..intrelacement (optional)

Missy_tagtemplate 39 download below
Scrap-kit Twilight's Magic from Crimson Butterfly Scrapz

This is a PTU scrap you can purchase it HERE

I'm using the artwork of Keith Garvy
As this is a PTU tube I can't supply it.
You can purchase his tubes HERE

Open the template in psp
Shift plus D to copy it, close the original
Delete the CR layer
Make the circle layer of the template active
Selections, select all.float, defloat
Selections, modify, smooth with settings below
Smooth amount..10
Corner scale..5
Both boxes ticked
Click ok
Copy and paste paper of choice as new layer
Selections invert and then hit delete on keyboard
Select none
Now do the above to all the layers on the template
Using what paper you want
Making sure you have the template layer active
That you are going to do.
On the small rectangle I added a texture
You can do what you like for the background
On all the original template layers
Drop-shadow all the layers settings below
V&H..2
opacity..60
blur..7
Black
Now copy and paste your tube as new layer
Add drop-shadow settings above
Add some effects on the long rectangles if you want
On the outside ones I just added some noise
The inner ones I added
Jeux de lignes ..intrelacement
With standard settings
Copy and paste glitter doodle 1 as new layer
Move this layer below the tube layer
Add drop shadow
Copy and paste journal paper 1 as new layer
Image resize 50%
Put anything you want on the paper
Now add some elements
When you have finished adding them
Add your name and any copyrights
Make the background layer active
Layers new raster layer
I've add some brushes to this layer
Layers merge all
Save
Thanks for doing my tutorial
Gaylene
xox