Please leave a little thank you...

If you do any of my tutorials could you please leave me a little message in the shoutbox i would like to hear what you think of them also would love to see your results you can email them to me my email addy is at the bottom of my terms of use.. thanks...

Sunday, January 18, 2009

True Love Is Forever...


Click on tag to see full size..

True Love Is Forever..

This tutorial was written by me on January 19th 2009
Any similarity to any other tutorial is purely coincidental
This tutorial was written in psp8 but should work in other versions.

Tools needed
Tube
Scrap-kit
Mask

I'm using a tube from Barbara Jenson
As this is a PTU tube I can't supply it.
You can purchase Barbara Jenson tubes HERE

Scrap-kit.. I'll Love You Forever PTU from Kirstys Scraps
You can purchase this gorgeous kit HERE

The mask I have used is tde_72

Download HERE

Put the mask in your psp mask folder

Plugins I have used are....

Xenofex 2 constellation
Penta.com VTR 2

Open new white image 700x580

Selections, select all, layers, new raster layer

Copy and paste paper 13 into selection, select none

Layers, load save mask from disc find the mask tde_72
Layers merge group, resize your mask by 90%
Layers duplicate, make the original layer active
Adjust, blur gaussian blur..10
Penta,com vtr 2 default settings
Repeat the above then sharpen 2 times
Make the top layer active
Now add some constellation sparkle if you want
Copy and paste frame 1 as new layer
Click inside of the frame with magic wand
Selections, modify,expand by 4
Layers, new raster layer, copy and paste paper of choice into selection
Select none
Drag this layer under the frame layer
Copy and paste your tube of choice as new layer
Place it where you want in the frame see my tag for reference
Now duplicate your frame layer
And drag this layer above your tube layer
With eraser tool erase parts of the frame that you want to
So some of your tube is outside of the frame
Drop-shadow your bottom frame layer and your tube layer
Now add what elements you want on your tag
Drop-shadow each layer and sharpen if you want to
When finished add your name and any copyrights
Layers, merge all
Save

Saturday, January 17, 2009

With Love To You...


click image to see full size...

With Love To You..

This tutorial was written by me on 18th January 2009

I hope you enjoy doing this tutorial as much as I did making it

Supplies you will need...

Tube

Mask

Scrap-kit


Download masks HERE


Scrap-kit I have used is called Cupid PTU

Thanks so much Mar it's gorgeous Purchase HERE


I am using the gorgeous artwork of Jennifer Janesko
This is a PTU tube and you must have a licence to use her artwork
You can purchase her artwork HERE

It took me ages to find the right tube for this tutorial

I think this tube looks gorgeous for this tutorial


Put the mask in your psp mask folder


Open new white image 700x580

Selections,select all

Layers new raster layer, copy and paste paper 3 into selection

Select none

Layers, load save mask from disc, find the mask you are going to use

Load, layers merge group

Copy and paste paper 26 as new alyer

Image resize 60%

Now copy and paste paper 7 as new layer

Image resize 50%

Add drop-shadow to both paper layers

Settings below

V&H...3

Opacity...60

blur...7

Colour black

Now change the V&H to -3

and add the drop-shadow to both layers

Copy and paste your tubes as new layer

Add drop-shadow

Place in the middle of the papers see my tag for reference

Copy and paste cupid 10 as new layer

Image resize 15%, layers duplicate, image mirror

Add drop-shadow to both layers

Copy and paste cupid 27 as new layer, resize 70%

Place under the tube layer, see my tag for reference

Add drop-shadow

Now add any other elements you want on your tag

Drop-shadow each layer as you go

When finished add your name and any copyrights

Layers merge all

Save

Thursday, January 15, 2009

Honeysuckle Rose.........


click on image to enlarge...

Honeysuckle Rose

This tutorial was written by me on January 16th 2009
Any similarity to any other tutorial is purely coincidental
This tutorial was written in psp8 but should work in other versions.
Tools needed
Tube of choice(close up tube is best)
Scrap-kit
Mask

put the mask in your psp mask folder

I am using the gorgeous artwork of Jennifer Janesko
This is a PTU tube and you must have a licence to use her artwork
you can purchase her artwork HERE

Mask... sg_sweet-valentine from EssexGirl
click on masks and its on page 23...

Scrap-kit Honeysuckle Rose freebie from Sabre
The Quill and Parchment
Thanks so much Sabre it's a gorgeous kit

This is a quick tutorial just copy and pasting

open new white image 650x650
selections, select all
open paper 3 in psp
copy and paste into selection
select none
layers, load save mask from disc
find sg_sweet-valentine mask, load
layers merge group
copy and paste honeysucklerose frame as new layer
image resize 80%
make the mask layer active
copy and paste your tube as new layer
erase any the tube outside of the frame
drop-shadow the frame and tube
now the easy part
just copy and paste what elements you want to use
and place them where you want
you will have to resize them to your preference
adding drop-shadow to each layer
i wrote Honeysuckle Rose on my tag
font used was Love Light
i also added gradient glow and a drop-shadow
when finished add your name and any copyrights
layers merge all
save

thanks for doing my tutorial
Gaylene
xox

Bad Girlfriend Tutorial....


Click on tag to see full size...

BAD GIRLFRIEND

This tutorial was written by me on January 15th 2009

Supplies needed...

Tube
Mask
Scrap-kit

Plugin...Alien Skin Xenofex...Constellation
Plugin...Tramages ...Tow the Line

Put the mask in your psp mask folder

I am using the gorgeous artwork of Jennifer Janesko
This is a PTU tube and you must have a licence to use her artwork
you can purchase her artwork HERE

Scrap-kit Bad GirlFriend PTU is from
Missy of Scraps with Attitude

Mask... sg_multi-floral-grungeframe 1 from EssexGirl
click on masks and its on page 21...

Open new white image 700x580
layers, new raster layer floodfill with 202020
or use a paper of choice from the scrap-kit
layers, load save mask from disc
find the mask then click load
layers merge group
Effects, plugins Tramages, tow the line
use defaut settings click ok
copy and paste your tube of choice as new layer
see my tag for placement
if possible use a tube like i have used
drop-shadow the tube
with your selection tool set on rectangle draw around the
large and small rectangles
change your selection tool to freehand and carefully draw
inside of both hearts
Effects, plugins, Alien Skin Xenofex...Constellation
with the settings below
2
6
1
1
100
55
45
keep original image ticked
click ok
Selections, select none
copy and paste what elements you want to use as new layers
resize them to your preference
adding a drop-shadow as you go
write something on the Journal if you want
when you have finished adding the elements
add your name and any copyrights
layers merge all
save

thanks so much for doing my tutorial
would love to see your results
you can email me
my email is just under my terms of use
hugs
Gaylene
xox

Tuesday, January 13, 2009

My Endless Love...


My Endless Love

This tutorial was written by me

Tools needed

Mask

2 Tubes (1 close up tube)

Scrap-kit


Download Mask HERE


I am using the beautiful PTU artwork of Jennifer Janesko

You can purchase her artwork HERE


Scrap-kit Endless Love from Creationz by Jo-CBJ

Which can be purchased HERE


Open new white image 700x580

Copy and paste paper 7 as new layer

Layers, load save mask from disc find Abrel_Braveheartscrapkit mask

Load, layers merge group

Copy and paste frame 2 as new layer

Image resize 70% place to the left of your tag

Copy and paste your close up tube as new layer

Drag this layer under the frame layer

Erase the tube outside the frame

Add drop-shadow to frame

Now copy and paste the other tube and place to the right of your tag

Add drop-shadow

Copy and paste what elements you want to use as new layers

Drop-shadow

Add your name and any copyrights to your tag

Layers merge all

Save


Twilight....


 This tutorial was written by me on January 13th 2009


Tools needed


Tube

Mask tde_06 in supplies

Scrap-kit

Background of choice


SUPPLIES


Plugin...Xenofex 2 Constellation (optional)


The tube I am using is a PTU tube from Al Rio

You can purchase it from HERE


Scrap-kit Twilight Love PTU from Connies Creative Chaos

You can purchase this awesome scrap-kit from HERE


Open new white image 700x580

Copy and paste paper 2 as new layer

Layers, load save mask from disc find tde_06, load

Layers merge group

With your selection tool set on rectangle draw around the inner mask square

Layers new raster layer

Copy and paste your background of choice into selection

Select none

Copy and paste Twifloweredribbon 1 as new layer

Place on the bottom of the rectangle see my tag for placement

You might have to erase some of the ends

Make your background layer active and add some constellation if you want

Now add what elements you want adding a drop-shadow as you go

I colourized the elements also settings below

Hue...255

Saturation...75

I have also added the word Twilight to my tag then added some constellation to it

Then added a drop-shadow

When you have finished adding the elements

Copy and paste your tube of choice as new layer

Add drop-shadow

Add your name and any copyright to your tag

Layers merge all

Save

Thanks for doing my tutorial

Gaylene

xxx


Monday, January 12, 2009

With Love.....


click on tag to see full size

This tutorial was written by me on January 13th 2009

Tools needed

Tube

Mask

Scrap-kit

Alien Skin Xenofex 2 Constellation Plugin (optional)


I am using the beautiful artwork of Jennifer Janesko

You can find her artwork HERE


Mask zuzanna-mask2

Download from here site

HERE


Scrap-kit For Michelle PTU from Captivated Visions

you can purchase from HERE

Also please visit Rachel's blog as she has gorgeous kits

HERE


Open new white image 700x580

Copy and paste paper 9 as new layer

Layers, load save mask from disc find suzanna-mask2

Load, layers merge group

Now copy and paste frame 5 as new layer

Image resize 90%

I also have added some Alien Skin Xenofex 2 Constellation

To this frame but you don't have to

Copy and paste your tube as new layer

Place on the frame where you want it

Now duplicate the frame layer

Drag this layer above the tube layer

And erase parts of the frame that you want to

So it looks like some of the tube is coming out of the frame

Now make the mask layer active

Copy and paste frame 3 as new layer

Image resize 95%

Drop-shadow this frame layer and your tube layer

Copy and paste any elements you want to use

As new layers on your tag

You will have to resize them, adding slight dropshadow as you go

When you have finished adding the elements

Add your name and any copyrights

Layers merge all

Save

Thanks so much for doing my tutorial

Hugs Gaylene

xox


Bright and Funky...


Bright and Funky

click on image to see full size..


This tutorial was written by me on January 12th 2009
Any similarity to any other tutorial is purely coincidental
This tutorial was written in psp8 but should work in other versions

Tools needed

2 tubes from the same artist
Mask
Scrap-kit

No supplies for this tutorial

I am using the artwork from Angie Monasterio
You have to have a Lic to use her artwork so I can't supply it

Scrap-kit Passion is a freebie from kittzkreationz
Download HERE
Click on older posts a few times to find it

Mask zuzzanna_mask03 by zuzzanna
Download from her site
Open new white image 700x580
Copy and paste paper of choice as new layer
I used paper 4
Layers, load save mask from disc find suzzanna mask-3
Load, layers merge group
Copy and paste circle frame as new layer
Image resize 70%
Place on your tag where you want it
Click inside of frame with magic wand
Selections, expand by 4
Copy and paste paper 14 as new layer
Selections, invert, then hit delete on your keyboard
Select none
Drag this layer under your frame layer
Add drop-shadow to your frame layer
Make the background layer active, copy and paste
One of your tubes as new layer
Erase any parts of the tube outside of the frame
Add drop-shadow to the tube
Now copy and paste the other tube as new layer
Place where you want it and add drop-shadow
Add what elements you want on your tag
Add drop-shadow as you go
When you have finished adding the elements
Add your name and any copyrights
Layers merge all
Save


Sunday, December 28, 2008

Happy New Year


Hi just wanted to wish everyone a
Happy New Year
hugs
Gaylene
xox

Any similarity to any other tutorial is purely coincidental
This tutorial was written in pspx but should work in other versions.

Tools needed

Tube of choice
Scrap-kit
Template
Animation of choice
Mask of choice

Scrap-kit Happy New Year freebie from Bluey
Download below
Doodle Template 1 from
I am using the artwork from Angie Monasterio
You have to have a Lic to use her artwork so I can't supply it

Open the template in psp
Windows, duplicate, close the original
Delete the CR layer
Make the 1st layer of the template active
Not the white background layer
Selections, select all.float, defloat
Selections, modify, smooth with settings below
Smooth amount..10
Corner scale..5
Both boxes ticked
Click ok
Copy and paste paper of choice as new layer
Selections invert and then hit delete on keyboard
Select none
Now do the above to all the layers on the template
Using what paper you want
Making sure you have the template layer active
That you are going to do.
Now delete all the original layers of the template
When you have finished add a drop-shadow
To all the template layers settings below
V&H..3
Opacity..60
Blur..7
Colour black
Now change the V&H to -3
And apply to all layers
Make the white background layer active
Layers new raster layer
Floodfill with #8C8141
Or colour of choice
Layers,load save mask from disc
Find a mask of choice, apply
Layers merge group
Now make the top layer active
Add what elements you want to use
Add drop-shadow to each layer
Copy and paste tube of choice as new layer
Add drop-shadow
Add your name and any copyrights to your tag
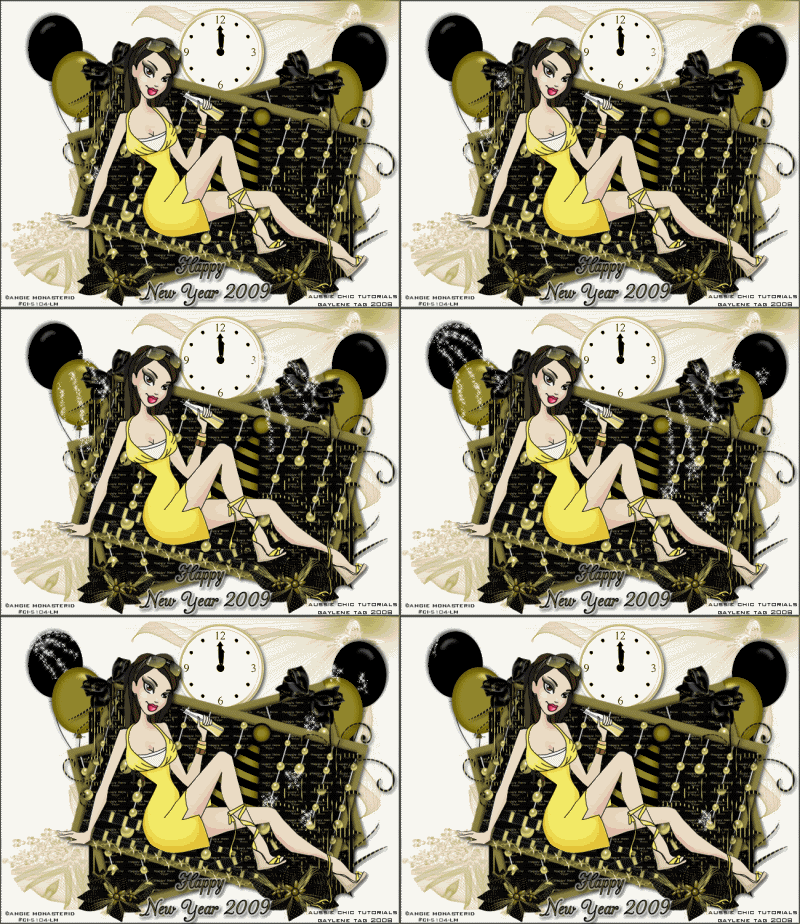
I wrote Happy New Year 2008 on mine also
Add some animation if you want
Layers merge all
Save

Monday, December 22, 2008

Thanks so much...


Thanks so much Trish its gorgeous xxx


and this tag is from Shari its beautiful

Thanks so much for emailing your results
hugs Gaylene
xoxox

Friday, December 19, 2008

Angels Kiss

click image to see full size

Angels Kiss


This tutorial was written by me on December 19th 2008
Any similarity to any other tutorial is purely coincidental
This tutorial was written in pspx but should work in other versions.

Tools needed

Tube of choice
Scrap-kit
Mask

NO SUPPLIES

Scrap-kit Angels Kiss PTU from Lynne
You can purchase the scrap-kit from HERE

The mask I have used is from Sabre
The Braveheart of Pansies download below

Put the mask in your psp mask folder

The tube I am using is the artwork of Dominic Marco
You can purchase the tube HERE

Open new white image 700x580
Copy and paste paper 3 as new layer
Layers,load save mask from disc
Find Braveheart of Pansies mask and apply
Layers merge group
Layers duplicate, merge down
This just makes the mask layer darker
Open the wreath in psp
Image resize about 40%
Copy and paste as new layer
Make the mask layer active
Copy and paste paper 14 as new layer
Move the paper so the bells are in the frame
Then erase the background from outside the frame
Add drop-shadow to the frame
Open the rain in psp
Image resize 60%, copy and paste as new layer
Move to the top left of your tag
Drag this layer below your frame layer
Layers, duplicate, image mirror
Now move the rain so that it joins properly
See my tag for reference if you want
Now sharpen both the rain layers
Make the wreathe layer active
Copy and paste tube of choice as new layer
Place where you want it on the wreathe
If you want your tube to look like mine do the following
Duplicate the wreathe layer
Drag this layer above your tube layer
Now erase what parts of the wreathe you want to
Add drop-shadow to the tube
Now add what elements you want on your tag
Adding drop-shadow as you go
And sharpen if you want to
When finished add your name and any copyrights
Layers merge all
Save
Thanks for doing my tutorial
Gaylene

Sunday, December 14, 2008

Hi everyone

Well i have finally got my internet back and about time i changed my internet provider and had to wait 2 weeks i was not a happy chappy i can tell you. I will be doing a couple of tutorials tonight so will catcha then, also thanks so much for all the comments i have received i will reply to them as soon as i can hugs Gaylene xxxxx

Sunday, November 30, 2008

Hi everyone,
just letting you all know that Gaylene will not be able to reply
to any comments untill she gets her internet back.
She thanks you all for all your lovely comments and
will reply to them when her internet is fixed.
Hugs from Natty xx

Monday, November 24, 2008

Midnight Blue


This tutorial was written by me on November 25th 2008

Any similarity to any other tutorial is purely coincidental
This tutorial was written in psp8 but should work in other versions.

Tools needed

Tube of choice
Scrap-kit
Mask.... Zuz_mask (in supplies)

SUPPLIES

Scrap-kit Midnight Blue freebie from Dee
Thanks so much this is a beautiful kit

http://designsbydee.blogspot.com/

Download HERE

I am using the beautiful artwork of Jennifer Janesko
You must have a lic to use her artwork

Put the mask in your psp mask folder

Open a new white image 700x590
Open paper 2 in psp
Image resize all layer 700x590 pixels
Copy and paste as new layer
Layers, load save mask from disc
Find zuz_mask load
Layers merge group
Open frame 7 in psp image resize 20%
Copy and paste as new layer
Click inside of frame with magic wand
Selections, modify expand by 4
Copy and paste paper of choice as new layer
Selections, invert, hit delete, select none
Drag this layer under the frame layer
Now copy and paste the tube as new layer
Place under the frame layer
You may have to erase some of the tube
Drop shadow the frame and tube
Now add what elements you want on your tag
Drop shadow each layer as you go
I also added some sparkles to the mask layer
When finished adding elements
Add your name and any copyrights
Layers merge all
Save
Thanks for doing my tutorial
Gaylene

Treasured friends award


I received this award from 3 beautiful friends..
thanks so much gurls for giving me this award

Missy

Kathleen

Aimee

Now i have to pass it onto 5 friends who havn't received it yet
i give this award to..

Betsy

Vaybs

Lesley

Nancy

MzJen

i am passing this award on to the above
hugs Gaylene
xox


Monday, November 17, 2008

Plum Gorjuss


click tag to see full size

This tutorial was written by me on November 18th 2008

Tools needed

Tube

Mask

Scrap-kit

Plugins needed:

Xenofex 2 constellation

Muras Meister, copies

Put the mask in your psp mask folder

Scrap-kit Gorjuss Plums freebie from Jill
Download below
I'm using background and tube from Suzanne Woolcott
This is a PTU tube so I can't supply it

Mask sg_multi-leafy-grungeframe1
It's on page 24
Open new white image 700x590
Copy and paste paper 3 as new layer
Layers, load save mask from disc
Find the mask sg_multi-leafy-grungeframe1
Load, layers merge group
Duplicate,layers merge down
Copy and paste frame 7 as new layer
Layers, duplicate, image resize 90%
I've added a texture to both of the frames
Make the top frame active
Effects, Xenofex 2 constellation
With the settings below
2
6
1
1
100
55
45
Keep original image ticked
Click ok
Add drop shadow to both frames
Settings below
V&H..3
opacity..60
blur..7
Black
Add drop-shadow again but change the 3 to -3
Add background of choice and tube inside the frame
Drag this layer down below the frame layer
Erase any parts outside the frame
Add drop-shadow to the tube
Make the top layer active
Copy and paste flower 8 as new layer
Image resize 10%
Don't move the flower
Effects Muras Meister, copies
With settings below
Put on circle
Number on 16
Shift X 46
Shift Y 52
Leave other setting the same
Load
Image resize 120% 2 times
Move below the frame layer
You may have to erase a little of the flowers in the frame
Add drop-shadow and sharpen
Now add what elements you want on your tag
Adding drop-shadow to each layer
When finished add your name and any copyrights
Layers merge all
Save
Hope you enjoyed doing my tutorial
Gaylene

My other tutorial site has nearly 25,000 hits
in about 4 months thanks so much you all
you can find my old tutorial site HERE
and a big THANK YOU to Kathleen for putting
all those tutorial in for me xxx

Friday, November 14, 2008

Aussie Christmas


click image to enlarge

This tutorial was written by me
As I am an Aussie just had to use this scrap-kit pmpl

Tools needed

Tube
Scrap-kit
Template
Vix Mask 139

For the mask click the link below, then click on goodies
Put the mask in your psp mask folder

Template ...Xmas Template 01 from Vaybs
Scrap-kit Aussie Christmas freebie from Shari
Thanks so much I love it..
I am using a garv tube
As this is a PTU tube I can't supply it

Open the template in psp, windows duplicate
And close the original
Delete the credit layer
Close of all the template layers except raster 8
Make raster 8 active
Selections,select all, selections float,
Now open paper of choice in psp
Resize about 30%
Copy and paste into selection
Select none
Make the next layer active
Do the same as above
Now do the same to all the template layers
I just colorized the circle word art
When finished add drop-shadow to all layers
V&H..3
opacity..60
blur..7
Blackadd a background to the round layer
Then add some writing to your round layer
See my tag for reference lol
Copy and paste your tube as new layer
Add drop-shadow
Make the background layer active
Layers, new raster layer
Open the gold background in psp, resize
Copy and paste gold background as new layer
Layers, load save mask from disc
Find Vix mask 139, click load
Layers merge group
Layers duplicate, image flip
Add drop-shadow
Add your name and any copyrights
Layers merge all
Save
Thanks for doing my tutorial
Gaylene

Thursday, November 13, 2008

Happy Holidays


This tutorial was written by me November 2008

Please don't copy

Tools needed

Tube

Scrap-kit

Mask sg_laced-file (mask page 29)

Candle flame


Plugin needed : Xenofex 2 constellation

Put the mask in your psp mask folder

Scrap-kit Christmas Tradition PTU from Baby Cakes Scraps

Thanks Lynne its beautiful

You can purchase it HERE

Mask sg_laced_file from essex girl down load below

I am using the beautiful artwork of Barbara Jensen
As this is a PTU tube you have to have a licence
So I can't supply it.

Open a new white image 700x590
Open the book in psp
Copy and paste as new layer
Layers, load save mask from disc
Find the mask I supplied, load
Layers merge group
Open happy in psp, image resize 30%
Copy and paste as new layer see my tag for placement
Do the same for holidays
Copy and paste your tube as new layer
Place bottom right of your tag
Add drop-shadow to all layers except the mask layer
Open candle cluster in psp
Image resize 70%
Place bottom left of your tag, and drop-shadow
Open holiday cluster in psp
Copy and paste as new layer, image resize 10%
Place top left of the tag,duplicate, mirror,duplicate,flip,duplicate mirror
Add drop-shadow to the 4 layers
Open red bow in psp
Copy and paste as new layer
Image resize 20% place top middle add drop-shadow
Add more elements of choice adding drop-shadow after each layer
When finished add your name and any copyrights to your tag
If you not going to animate
Layers merge all
Save

ANIMATION

Open your candle flame in animation shop
if you have one
As it has 4 frames we have to make the sparkles with 4 frames
Make the little blue sparkles layer active
Effects,Xenofex 2 constellation
Settings below
Star size 2.00
0
1
1
100
85
Twinkle rotation 45
Keep original image ticked
Click ok
Copy merge and paste in AS as new animation
Back to psp
Undo the twinkles
Now do the twinkles again but hit the random seed once
Copy merge and paste in AS after current frame
Do above so you have 4 frames in AS
Ok now to add the candles
Edit, select all, edit copy
Back to your tag
Edit, select all,edit paste into selected frame
Do this till you have the 3 candle flames
Now save
Thanks for doing my tutorial
Gaylene
Xox


Tuesday, November 11, 2008

Autumn Wishes


click tag to see full size

This tutorial was written by me on November 12th 2008
Any similarity to any other tutorial is purely coincidental

Tools needed

Tube of choice
Scrap-kit
Template of choice
Mask.... 179 (in supplies)

I don't know where I got the mask if it's yours
Please let me know and I will give you proper credit.

Put the mask in your psp mask folder


Scrap-kit Autumn Wishes FTU and the Template from Kirsty
Thanks so much Hun it's beautiful

She has closed her blog sorry

I am using the beautiful artwork of Jennifer Janesko
You must have a lic to use her artwork

Open the template in psp
Windows, duplicate get rid of the original
Delete the copyrights
Layers new raster layer
Floodfill with white
Drag this layer to the bottom
Open a paper of choice in psp
As you will see this kit is huge lol
So resize the paper to 600x600 pixels
All layers clicked
Copy and paste as new layer
Layers, load save mask from disc find mask 179
Load, layers merge group
Now make the first layer of the template active
Selections,select all, float
Open another paper in psp, resize then
Paste into selection, select none
Do the same as above for all the template layers
When finished add drop-shadow to all layers
I sharpened mine but you don't have to
I also duplicated the doodle layer
Mirrored then flipped it
Copy and paste your tube as new layer
Place in the center of the frame
Duplicate the top frame
Drag this layer above the tube layer
Erase what parts of the frame you want to
So the tube looks like mine
Copy and paste what elements you want to use
Resizing them heaps as you go
Adding a drop-shadow to each layer
And sharpen if you want to
When finished add your name and any CR
Layers merge all
Save

Thanks for doing this tutorial
Gaylene

Autumn Splendor


This tutorial was written by me November 12th 2008

Tools needed

Tube of choice
Scrap-kit
Mask ...BflyFlby mask23
Animated Bee's (in supplies)
Background (in supplies)

If the Bee's are yours please let me know
and I will credit you.

SUPPLIES

Plugin...Muras Meister, copies

Mask from ButterflyFlutterby Creations
You will have to click on older posts a couple of times

Put the mask in your psp mask folder

I am using the gorgeous artwork from Barbara Jenson
So I can't supply the tube

Scrap-kit Fall Frolic PTU from MoonBeams Creations
You can purchase the kit from HERE

Open new white image 650x650
Copy and paste paper of choice as new layer
Layers new mask layer from disc
Find BflyFlby mask23
Load,layers merge group
Image resize 105%
Copy and paste another paper of choice as new layer
Repeat above steps but don't resize
Copy and paste frame of choice as new layer
Resize 120% 2 times or till it fits in the mask
Copy and paste background I supplies as new layer
Drag this layer under the frame layer
Delete the background outside the frame
Add drop-shadow to frame and background
Copy and paste flower of choice as new layer
Image resize about 30%
Effects, Muras Meister, copies
Just change the number to 12
And use circle, click ok
Image resize110% 2 times
Drag this layer below the background layer
Add drop-shadow I also added some noise
Copy and paste tube of choice
Resize if you have to
Add drop-shadow
Add some writing in the frame if you want
I also added some noise and drop-shadow
Add what elements you want on your tag
Adding drop-shadow to each layer
When finished add your name and any copyrights
If you are not going to add the bee's
Layers merge all
Save

ANIMATION

Copy merge your tag and paste in animation shop as new animation
Open the bee's in animation shop
You will see the bee's have 12 frames
So we have to make your tag have 12 frames as well
Left click then Right click on your tag
Layers duplicate selected, keep doing this till you have 12 frames
Pull the scroll bar down to the bottom of your tag
That way you can see how many frames you have done
When finished adding the frames push the bottom scroll bar to the left
So you can see frame 1
Now back to the bee's, edit, select all, edit copy
Back to your tag edit, select all,edit paste into selected frame
Move the mouse to where you want the bee's
Then click the mouse once
Click on view animation and see if it's animated
If happy click on view animation again
Save
Thanks for doing my tutorial
Gaylene