Please leave a little thank you...

If you do any of my tutorials could you please leave me a little message in the shoutbox i would like to hear what you think of them also would love to see your results you can email them to me my email addy is at the bottom of my terms of use.. thanks...

Friday, September 21, 2012

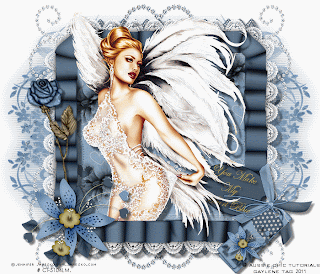
Yearning for you.


Yearning for you.


Click on Blend to see full size 
 
This tutorial was written by me on 21/09/2012
I hope you enjoy doing it
 I have supplied the tubes
Download HERE
Plugin's needed are
 Filters unlimited, render & paper textures,
 
Xero, mistifier
 
 Flaming Pear, glitterado
 FM Tile tools blend emboss
Ok let's get started
 Open a new transparent image 1100x850
 Foreground colour 3e3f44 & background colour 171717
 Fill layer with foreground colour,
 effects plugins Filters unlimited, render, foreground background clouds colour default settings
 Effects flaming pear, glitterado with these settings
 76,22,33,20,37,45 and 29
 Stars 18,43,35,22 and 14
 
Layers, new raster layer, selections, select all
 
Selection modify, contract 40
 Fill with foreground colour
 Effects plugins Filters unlimited, render, foreground background clouds colour default settings
 Effects drop shadow colour 6e4c43
 2, 2, 50, 1 then again drop shadow but use -2, -2, 50, 1
 Selections, select none
 Copy and paste the background tube as new layer
 Move slightly to the right
 Make this layer 40%
 Effects blend emboss default settings
 Copy and paste the flower tube as new layer
 Image resize about 70%
 Luminance legacy and 15%
 Add drop shadow 1,1,50,1, black
 Move to the left
 Effects fm tile tool blend emboss default settings
 Effects plugins Filters unlimited, paper textures, canvas fine 90 & 87
 Copy and paste the woman tube as new layer
 Image resize 70%
 Move to the left and add drop shadow 1,1,50,1,black
 Copy and paste tube 1 as new layer image resize 50%
 Place bottom right luminance legacy and 63%
 Add drop shadow same as above
 Effects fm tile tool blend emboss default settings
 Layers, new raster layer
 Add your name or water mark
 Layers merge all
 Image add borders 2 white make sure symmetric is ticked
 Click the white border with magic wand fill with silver pattern
 Select none
 Save as JPEG image
Thanks for doing my tutorial
 Gaylene.


Wednesday, August 22, 2012


 I am not going to be making tutorials anymore
 but will keep the links updated in here for you all
No one leaves a thank you anymore,
         love Gaylene.

Sunday, December 18, 2011

Just a little lovin


Tutorial HERE

Download freebie Scrap-kit Just a Little Lovin HERE

Happy Halloweenie


Tutorial HERE

Download scrap-kit freebie HERE

Guardian of Prayers


Tutorial HERE

Freebie scrap-kit SS Onyx download HERE

Simply Maria


Tutorial HERE

Scrap-kit Freebie download HERE

True Blue


Tutorial HERE

Download Scrap-kit HERE

Saturday, December 17, 2011

Beauty Unbound


Tutorial HERE

Scrap-kit F.T.U. from Teresa

She has deleted her blog so download the kit HERE

So many scrap-kit blogs have been deleted now.

Saturday, December 10, 2011

Terry's Delight


Tutorial HERE

My Healing Heart


Tutorial HERE

Innocent Spirits


Tutorial HERE

Girls Rock Too


Tutorial HERE

Scrap-kit Girls Rock Too HERE

Scroll down the page nearly to the bottom of page

This is a F.T.U. Kit

Thanks Missy

Wednesday, November 30, 2011

Blue Heart

Blue Heart

This tutorial was made by me on 1/12/11
It's been about 2 years since my last one so here goes
This tutorial will be an easy one till I get back into the swing of things

Supplies you will need

Scrap-kit
Tube
Mask
Plugin used ..
Cybia Screenworks

The scrap-kit I am using is ''You Make My Heart Blue'' from
It's a freebie thanks Bluey it's beautiful
It's about half-way down the page

The tube I have used is a P.T.U. Jennifer Janesko
Purchase from HERE

The mask I have used is sg_stencilled-flower-square-4
Down-load HERE

Put the mask in your psp masks folder

Open new white image 700x600
Selections, select all
Layers, new raster layer
Copy and paste paper of choice into selection
I used paper 1
Select none
Layers, load save mask from disc, find the mask, load
Layers, merge group
Duplicate layer
Make the original mask layer active
Adjust,blur,Gaussian blur on 20
Cybia Screen works,fine rule mode on 0
Merge these 2 layers visible
Adjust,sharpness sharpen
Copy and paste frame of choice as new layer
You might have to resize a little
Now copy and paste tube of choice as new layer
Place on frame where you want it
Now make your frame layer active and layers duplicate
Move this layer to the top and erase the parts of the frame
That you want the tube to show out-side the frame
See my tag for reference
Add drop-shadow to each layer and sharpen all layers
Copy and paste what elements as new layers
That you want to use
Drop-shadow and sharpen them if you want
Add your name and any copy-rights to your tag
Hope you can understand this tutorial lol
I am out of practice writing them
Please let me know if you have done it
Leave a message ok
Gaylene
Xox

Tuesday, November 29, 2011

Fairy Thoughts

Tutorial HERE

Justine has removed her blog so download the kit below

Download Scrap-kit HERE

Gorjuss in Pink

Click HERE for tutorial
Scrap-kit is in the tutorial to download

Monday, November 28, 2011

Flying with Butterflies


Tutorial HERE

Scrap-kit Flying Butterflies by Muriel
Download HERE

Sweet Like Candy


Tutorial HERE

Scrap-kit 'Sweet Like Candy' freebie by Nat
She no longer has a blog and has given me permission
to let you download it from HERE
Thanks Nat.

Saturday, November 26, 2011

Love Me Tender


This tutorial was written by Gaylene
Any similarity to any other tutorial is purely coincidental
This tutorial was written in psp8 but should work in other versions.

Tools needed

Tube
Scrap-kit
Word-art (supplied)
Doodle (supplied)


Plugin...Xenofex 2 constellation
Mura Meister copies
penta.com VTR 2

Scrap-kit is called Forever Pastel
Her blog is closed now download scrap-kit below

I'm using a tube from Barbara Jenson
As this is a PTU tube I can't supply it.

Open new white image 650x650
Open the doodle ive supplies in psp
Adjust, hue & saturation,colorize
Hue..104
Saturation..84
Image resize 30%
Copy and paste as new layer, don't move it
Mura meister copies settings below
Circle, tile mode, blend mode
Number on 12 everything else leave them
Image resize 110% 3 times
Layers duplicate, make the original layer active
Adjust, blur gaussian blur..10
Penta,com vtr 2 default settings
Repeat the above then sharpen 2 times
Make the top layer active
Now add some constellation sparkle if you want
Open frame 4 in psp
Image resize 80%
Copy and paste as new layer
I clicked on the pink part of the frame with magic wand
And added some texture weave, setting below
1,5,1, both white click box
Click inside of frame with magic wand
Selections modify expand by 4
Copy and paste paper of choice
Selections invert, delete, select none
Drag this layer under the frame layer
I added some sparkles to the paper
Add drop shadow to frame
V&H..2
opacity..60
blur..7
Black
Copy and paste the word-art I supplied
Add drop-shadow
Add a brush also if you want around the circle in the frame
Copy and paste bow 5 as new layer
Image resize 20%
Place top middle of frame
Duplicate and add some more around the frame
Add drop-shadow and sharpen
Add more elements that you want
Copy and paste your tube as new layer
Add drop-shadow
When finished add your name
And any copyrights
Layers merge all
Save
Thanks for doing my tutorial
Gaylene

Wednesday, November 23, 2011

Sparkle Eyes


My first tutorial i ever done and i think it's still my favourite lol
tutorial HERE

Scrap-kit Sparkle Eyes HERE

F.T.U. from Missy

New Posts


All the tutorials i have below are older one's
i have just up-dated the links for them.
Will do some more later that's enough for today
love Gaylene
oxo