Please leave a little thank you...

If you do any of my tutorials could you please leave me a little message in the shoutbox i would like to hear what you think of them also would love to see your results you can email them to me my email addy is at the bottom of my terms of use.. thanks...

Monday, July 6, 2009

Dakota's Dream Tutorial...


Click on tag to see full size...

This tutorial was written by me on July 7th 2009

Please don't copy it and claim as your own


Supplies needed

Tube

Scrap-kit

Mask

Plugins needed...(Optional)
Tramages..Tow The Line
Xenofex..Constellation

Scrap-kit FTU Dakota's Dream made by me...
Download HERE

I only have the elements i used in the tutorial
when i got my comp fixed heaps of psp stuff got wiped out

The tube I have used is the gorgeous artwork from
Zindy Nielsen purchase from HERE

Mask i used is Zuzzanna-mask 60
Download HERE
it's the 9th mask down the page

Open new white image 650x650
Selections, select all, layers, new raster layer
Copy and paste paper 3 into selection, select none
Layers, load save mask from disc find the mask
Click ok, layers, merge group
with selection tool set to rectangle draw just inside
the large rectangle
layers, new raster layer, copy and paste paper 5 into selection
select none
Effects, Tramages, Tow the line use default settings
Copy and paste frame 3 as new layer
Image resize 110% 2 times, move slightly to the right
Add drop-shadow
Selection tool draw on the black inner border of the frame
Copy and paste background of choice as new layer
Selections, invert, delete, select none
Drag this layer below the frame layer
Make the mask layer active
Effects, Xenofex, Constellation, settings below
2,26,1,3,100,75,
Twinkle rotation, 45
Keep original image ticked
random seed on 5677, click ok
Make the top layer active
Copy and paste flowers 4 as new layer, image resize 95%
place to the left of tag see my tag for reference
drag this layer below your mask layer
layers, duplicate, image, mirror
With eraser tool erase the bottom branches sticking out below
add slight drop-shadow to both layers
copy and paste tube of choice as new layer
resize if you want and then add drop-shadow
now copy and paste what other elements you want on your tag
as new layers, adding slight drop-shadow as you go
when finished add your name and any copyrights
I wrote Dakota's Dream on mine
the font i used was AL Fantasy Type
Image, Picture frame, I used Corners Album, click ok
layers, merge all, resize if you want to
save as...
Thanks so much for doing my tutorial
hope you like the scrap-kit Dakota's Dream i made
Please leave me a comment if you download it
hugs Gaylene xox

Wednesday, June 24, 2009

Dakota's Dream Scrap-kit...


Whooo Hooo made this scrap-kit with nooooooo help lmao

Download HERE

Please leave me a comment if you download it
took me hours to make ....

thanks so much
Gaylene
xox


Sunday, June 21, 2009

Charlies Passion Scrap-kit......


I have finally had a go at making a Scrap-kit lmao
i just hope some-one downloads and uses it
below is a tag i made with it
will write the tutorial for it tomorrow night
as i am to lazy to do it now
Also a special thank you to Nat for her help lol

Download the kit HERE


Monday, June 15, 2009

Thanks Betsy...


Thanks so much Betsy for this gorgeous gift
hugs Gaylene xox

Wednesday, June 10, 2009

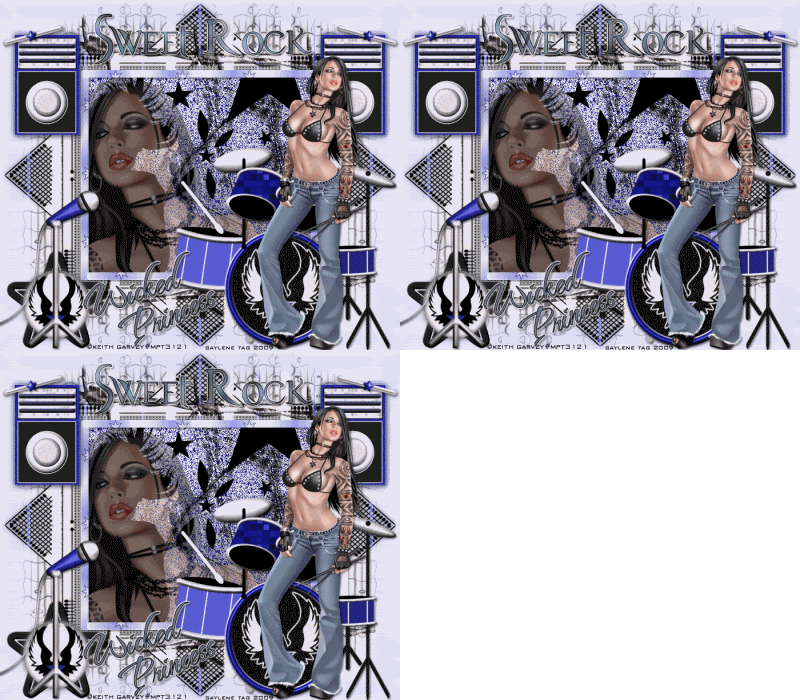
Sweet Rock...


This tutorial was written by me on June 10th 2009
Any similarity to any other tutorial is purely coincidental
This tutorial was written in psp8 but should work in other versions.

Tools you will need...
1 Tube & 1 close up transparent tube from same artist
Mask
Scrap-kit

Plugin needed.. Eye Candy 5, Impact, Backlight
Cybia, ScreenWorks, Fine Rule

Scrap-kit Sweet Rock PTU from Wicked Princess
Purchase from HERE

The tubes I have used are PTU from Keith Garvey
Purchase from HERE

Mask sg_quilt-and-lattice from Essex Girl
Download HERE

Open new white image 700x600
selections, select all, layers, new raster layer
copy and paste paper 7 into selection, select none
Layers, load save mask from disc, find sg_quilt-and-lattice mask
load, layers, merge group, layers, duplicate
On the original mask layer Adjust, blur, gaussan blur on 5, click ok
Change the colours in your palette to..
Foreground..#BFBDF3
Background...#F6F6F6
Eye Candy 5, Impact, Backlight .. Click on colours
and make the colours the Same as your colour palette
leave all other setting as is.. Click Load
make the top mask layer active
Get your selection tool on rectangle
and draw around the large rectangle on the mask
copy and paste paper 19 as new layer, selections, invert
hit delete on your keyboard, select none
copy and paste your close up tube as new layer
place to the left see my tag for reference
Open tape 1 in psp, with your selection tool on rectangle
Draw a thin strip across half way through the first star
See my tag if you not sure what I mean lol
Copy and paste as new layer on your tag
Image resize 50%, place up top of your mask rectangle
Layers, duplicate, image flip
Layers, duplicate, image, rotate 90 degree's right
Place on the side, layers, duplicate, image mirror
You should now have a border around the mask rectangle
Copy and paste the drums as new layer
Image, resize 75%, place bottom right of the tag
Add drop-shadow
Copy and paste your main tube as new layer
Place in front of the drums & drop-shadow
Copy and paste speaker 1 as new layer, image resize 40%
Layers, duplicate, on the original speaker layer
Adjust, blur, gaussian blur 4 click ok
add Cybia, ScreenWorks, Fine-rule
merge these 2 layers visable, place top left on your tag
layers, duplicate, image mirror, Drag this layer
Under your tube layer
Copy and paste wire 2 as new layer, place up top of your tag
Drag this layer down so it's above your original mask layer
Layers, duplicate, image, flip
Copy and paste what other elements you want as new layers
Drop-shadow each layer as you go
Add your name and any copyrights to your tag
Layers, merge all
Save
I have added some animation to Sweet Rock also
Gaylene

Tuesday, June 9, 2009

Mariah...


Click on tag to enlarge

I wrote this tutorial on June 10th 2009
Any similarity to any other tutorial is purely coincidental
This tutorial was written in psp8 but should work in other versions.

Supplies needed..

Tube

Mask (in supplies)

Scrap-kit

Plugins needed...

DSB Flux.. Blast & Eye Candy 5, Impact, Perspective Shadow


Scrap-kit Mariah FTU from Bluedream Designs

Download HERE

Thanks Bluey for the freebie it's gorgeous


SUPPLIES


Mask I used is maskCris2

I can't remember where I got this mask from

If it's your please let me know & I will give proper credit for it.


Tube is from Keith Garvey it's PTU tube

Purchase from HERE


Open new white image 700x580

Selections, select all, layers, new raster layer

Copy and paste paper of choice into selection, select none

Layers, load save mask from disc, find maskCris2, load

Layers, merge group

Repeat the above but use a different paper

Then image, resize by about 95%

Copy and paste frame of choice as new layer

Image, resize about 70%

With deform tool carefully pull out to fit on the the mask

See my tag for placement

Click in the frame with magic wand

Selections, modify by 4, Copt and paste paper of choice as new layer

Selections, invert, hit delete on your keyboard

Select none, drag this layer under the frame layer

Make the white background layer active now

Copy and paste mesh 2 as new layer, move to the left

Layers, duplicate, image, mirror

Make the top layer active now

Copy and paste ribbon 1 as new layer, move up to the top

See my tag, drag this layer above your mesh layer

Layers, duplicate, image flip

Add drop-shadow and sharpen to both layers

Make the background layer in your frame active

Apply DSB Flux, Blast, apply all 4 directions and put

Percentage on 20, copy and paste your tube as new layer

Resize it so it fits in the frame, layers, properties

I put my Opacity on about 60' click ok

I also added some blinds choice is yours though

Now add some word-art of your choice

I've used some from Clareys Designz

Add drop-shadow to your frame, and word-art

Copy and paste your tube again as new layer

Place to the right of your tag & add drop-shadow

Copy and paste some elements as new layers

Adding a drop-shadow to these layers & sharpen

Add your name and any copyrights to your tag

Close of the white background layer, merge all the other layers visible

Now open your white background layer

Make the merged layer active

Now get the Eye Candy 5, Impact, Perspective Shadow up

Unclick the Reflect Selection Colour

Click on the little black arrow & make your foreground & background

Colours what you want, now click on the Reflect Selection Colour again

Click ok, layers, merge all, save as...

Add a border if you want also

Thanks so much for doing my tutorial

Gaylene

Sunday, June 7, 2009

Oriental Dreams...


click on tag to enlarge..

This tutorial was written by me on June 7th 2009
Please don't copy and claim as your own
This tutorial is very easy to do just copy and pasting.

Tools needed..
2 tubes from the same artist
Scrap-kit
Mask

I have used the beautiful artwork by Jennifer Jasenko
You can purchase her tubes HERE

Scrap-kit Oriental Dreams PTU from Aussie Scrap Designs
Purchase HERE

The mask I have used is zuz_mask 3
Download HERE

Open new transparent layer, flood-fill white
Open paper 7 in psp, image, resize 20%, all layers ticked
Now copy and paste as new layer on your tag
Layers, load save mask from disc, find suz_mask 3
Load, layers, merge group
Get your selection tool on rectangle & draw just inside of the
Mask rectangle, layers, new raster layer
Flood-fill with black, copy and paste Japanese wall as new layer
Move in the mask rectangle where you want it
Selections, invert, now hit delete on keyboard
Selections, none
Layers, properties put the opacity on about 80, click ok
Copy and paste 1 of your tubes as new layer
Place to the right see my tag for reference
Copy and paste your other tube as new layer
Place where you desire
Now copy and paste what elements you want to use
As new layers
Add slight drop-shadow to each layer
Add some writing if you want then drop-shadow
Put your name and any copyrights on your tag
Layers, merge all
Save as...
Thanks for doing my tutorial
Gaylene

Saturday, June 6, 2009

Thanks Myrtle for this award...


I received an Award today from my dear friend Myrtle
Thanks so much hun for thinking of me for this beautiful Award

You have to...

1. Add the logo to your blog;

2. Link to the person from whom you received this award;

3. Nominate 2 or more blogs

Leave a message on their blog, letting them know they are One Lovely Blog!

I'm giving this award to these lovely blogs:


Raeven.. Heart & Soul Creations

Lana.. What Dreams May Come

Noelle.. Noelle's Tutorials

These 3 ladies deserve this award..
xox

Friday, June 5, 2009

Classic Beauties...


Click on tag to enlarge

I wrote this tutorial on June 6th 2009
Any similarity to any other tutorial is purely coincidental
This tutorial was written in psp8 but should work in other versions.

You will need...

2 Tubes from the same artist

Scrap-kit

Mask

Put the mask in your psp mask folder

Download mask HERE


The tubes I have used are from the gorgeous art-work of

Jennifer Janesko you must have a license to use them

Purchase from HERE


Scrap-kit Classic Beauty PTU from Gail...Aussie Scrap Designs

You can purchase from HERE


Open new transparent image 700x580, flood-fill white
Selections, select all, layers, new raster layer
Copy and paste paper of choice into selection
Select none
Layers, load save mask from disc, find SL-Mask 21 Sabre
Load, layers, merge group
Image, resize 110% then again 105%
Copy and paste lace as new layer, image, resize 90%
Selections, select all, selections, float
Flood-fill with a colour from your tubes,
Select none. Adjust, Sharpen
Copy and paste frame 4 as new layer, image, resize 90% for now
All layers not ticked ok
Image, rotate, free rotate 90% right, all layers not ticked
Image, mirror
Copy and paste one of your tubes as new layer
Place on the frame, now duplicate the frame layer
Drag this layer above your tube layer
Now erase what parts you want to so some of the tube is outside the frame
Now merge the 2 frame layers & the tube layer together
Image, resize about 70% & place to the left of your tag
See my tag for placement if you want
Add a drop-shadow and sharpen
Copy and paste your other tube as new layer
Place to the right of your tag, add slight drop-shadow
Copy and paste what elements you want to use on your tag
Adding a slight drop-shadow and sharpen as you go
Add your name and any copyrights to your tag
Layers, merge all
Save as...
I have added a couple small borders to my tag
Just use what you have and your imagination lol
Thanks for doing my tutorial
Gaylene...

Wickedly Dark....


click on tag to see full size...

This tutorial was written by me on June 5th 2009

Please don't copy and claim as your own


Supplies you will need...

Tube

Scrap-kit

Mask

Put the mask in your mask folder

Plugins needed.....


Xenofex.. Constellation & Lightning

AAA Filters... Tweed Frame

Dragonfly..sinedots 2


The tube I have used is a PTU one from Jennifer Janesko

You can purchase her tubes from HERE


Scrap-kit Wickedly Dark FTU from Wicked Princess

Download HERE


The mask I have used is SL-MorningGloryMasksabre from Sabre

Download HERE


Open a new transparent image 700x580, flood-fill with black

Selections, select all, layers, new raster layer

Copy and paste paper 13 into selection

Select none

Layers, load save mask from disc, find SL-MorningGloryMasksabre

Load, Layers, merge group. Image, resize 110%

Make raster 1 layer active, Xenofex, lightning, settings below

Taper main arc ticked, 2, 92, 90, 36, random seed on 5916, click ok

Layers, new raster layer, apply the lightning again

Image mirror, move the lightning down slightly

Layers, new raster layer, apply Dragonfly, Sinedots 2

I used default settings, layers, duplicate, image, mirror

Move the sinedots carefully where you want it

Layers, Properties, put the Opacity on 43, click ok

Do this to the both Sinedots layers

Now add some Xenofex, Constellation to both the Sindots layers settings below

2,6,1,1,100,55, 45 and keep original image ticked, random seed on 5571

Click ok

Make the top layer active, copy and paste frame 3 as new layer

Image, rotate, 90 Degree's right, all layers not ticked

Image, resize, 95% copy and paste your tube as new layer

Resize the tube if you want and place in the frame where you want it

Now duplicate the frame, and drag above the tube layer

Erase what parts of the frame you want to so some of the tube is outside the frame

Copy and paste rose 2 as new layer, I colourized the roses blue

And resized them 60%, place where you want them

Duplicate as many times as you like

Copy and paste Heart chain 1 as new layer, place on the frame

Add drop-shadow, write what you want in the heart

I wrote Shani as she made the scrap-kit and this tag is a gift to her

Add slight drop-shadow to the writing

Copy and paste flower 2 as new layer, resize and rotate them

I also duplicated them and them resized them again

Add drop-shadow and sharpen them

Add your name and any copyrights to your tag

Now make raster 1 layer active, AAA Filters, Tweed frame

With these settings 5,150, 0,0,0,0,100 & Normal clicked

Now click ok

Layers, merge all & save as..........

Thanks for taking the time to do this tutorial

Gaylene

xox

Wednesday, June 3, 2009

Tranquility....


Click on tag to see full size...

This tutorial was written by me on June 4th 2009

Please don't copy it and claim as your own


Supplies needed

Tube

Scrap-kit

Mask

Plugins needed...
AAA Frames... Texture Frame
Cybia, Screenworks, Fine Rule


The scrap-kit Tranquility PTU from Heart & Soul Creations
Purchase HERE

The tube i have used is a PTU from Barbara Jensen
Purchase HERE

The mask I used is hjr_mask_flowers 1
Download HERE

Put the mask in your psp mask folder

Open new transparent image 700x580, flood-fill white
Selections, select all, layers, new raster layer
Copy and paste paper 8 into selection
Select none
Layers, load save mask from disc, find hjr_mask_flowers 1
Load, layers, merge group
Effects, apply the plugin, AAA Frames.. Texture Frame
Leave setting as they are, apply
Duplicate this layer, make the original layer active
Adjust, Blur, Gaussian Blur, put on 10 click ok
Apply Cybia, Screenworks, Fine rule, mode on 0 click ok
Do the same as above again with the mask
But copy and paste paper 7 into selection
Select none
Iv'e also added AAA Frames.. Texture Frame
Choice is yours if you want to add it
I had to copy and paste the blue mask layer as new image
Then added the texture frame, then copy and pasted it on my tag
Then deleted the original blue mask layer
Then added the blur and fine rule also
Adjust, Sharpness, sharpen both layers
Copy and paste frame of choice as new layer
Image resize about 80%, all layers not ticked
Click inside of frame with magic wand
Selections, modify, expand by 4, layers, new raster layer
Copy and paste paper of choice into selection
Select none
Drag this layer under the frame layer
I added some brushes in the frame
You can put what you want in the frame though
Sharpen the frame layer
Copy and paste your tube of choice as new layer
Place on the frame where you want it
Resize the tube if you have to
Make the frame layer active, layers, duplicate
Drag this layer above your tube layer
Now erase what parts of the frame you want to
So some of the tube looks like it's outside of the frame
Add slight drop-shadow to the tube if you want
Copy and paste what elements you want on your tag
As new layers
Add slight drop-shadow and sharpen if you like
Add your name and any copyrights
Layers, merge all
Save as...
Thanks so much Raeven for this gorgeous Scrap-kit
Hugs Gaylene
xox

Sunday, May 17, 2009

Love Is In The Air...


Click on tag to see full size...

Love Is In The Air...

I wrote this tutorial on May 18th 2009
Any similarity to any other tutorial is purely coincidental
This tutorial was written in psp8 but should work in other versions.

Supplies needed

4 tubes from the same artist

Mask of choice

Template

Scrap-kit

Plugin I have used is.. Cybia, Screenworks....Fine Rule


The tubes I have used are PTU from Barbara Jensen

You can purchase them HERE


Scrap-kit PTU Love Is In The Air from Heart & Soul Creations

As you proberly realized by now I love Raevens Scrap-kits

She does such awesome kits thanks Hun

You can purchase this scrap-kit HERE


The template I have used is Yvette_EOC_Template71

You can download HERE


Open the Template in psp, Windows, duplicate

Get rid of the original template you don't need it now

Now delete the copyright layer

Make the rounded rectangle layer active

Selections, select all, float, defloat, modify, smooth use default settings

Copy and paste a paper of choice as new layer

Selections, invert, then hit delete on your keyboard

Select none

Delete the original template layer

Do the same for all the other template layers

Now copy and paste 3 of your tubes as new layers

Resize them if you have to & add slight drop-shadow to all your tubes

Drag the tube layers below raster 3

Now x out the white background layer make raster 1 layer active

Open a new white image 700x580

Copy and paste a paper of your choice as new layer

Layers, load save mask from disc, find your mask of choice

Click ok, layers, merge group

Effects, Cybia, Screen works, fine Rule mode on 0, click ok

Now copy merge your template layers and paste as new layer

On your mask layer

Move up slightly, layers, duplicate, now move down slightly

See my tag to see what I mean lol, layers, merge down

Add drop-shadow to this layer

Copy and paste what elements you want to use as new layers

Add drop-shadow and sharpen each layer as you go

You will have to resize some of them

I've added some writing to my tag you can add what ever you want

Add your name and any copyrights

Layers, merge all

Save

Saturday, May 16, 2009

Beauty & Feather's...


Click on tag to enlarge

I wrote this tutorial on May 16th 2009
Any similarity to any other tutorial is purely coincidental
This tutorial was written in pspx but should work in other versions.

If any of the things I have used are yours please let me know so I can give you credit for them.


All the tubes I have used are in the supplies except for the Jessica Dougherty tube

You must have a license to use her art-work

Purchase HERE


The mask I have used is hjr_mask_texture 49

From Hans Paintshop Palace

Put the mask in your psp mask folder


Plugin needed...Filters Unlimited 2.0.. Gradients, Linear Duplex,


SUPPLIES


Open new white image 362x504

Open the beach template in psp,

Adjust, Hue & Saturation, Colorize, settings below

Hue..139...Saturation..40...

Copy and paste as new layer on your image

Layers, duplicate, move down to the bottom of your tag

Just minimize this beach template as we will be using it again

Copy and paste your tube of choice as new layer

Layers, merge all

Image, add borders, put all on 1 & colour on #3B5057 click ok

Image add borders, put all on 10 colour white

With magic wand click inside of the white border

Flood-fill with #B2C0CA, keep selected

Effects, Texture effects, Weave, settings below

1, 1, 10 and both colours on #56656B

Fill gaps ticked, click ok,

Add drop-shadow 2,2,50,7 colour black, click ok

Repeat but put -2 on both V & H

Select none

Image, add borders, put all on 1 & colour on #3B5057 click ok

Now put this aside for the being

Open a new white image 700x580

Layers, new raster layer, flood-fill with #6E858E

Layers, load save mask from disc, apply the mask

Layers, merge group

Copy and paste the beach template as new layer, place to the top left

Layers, duplicate, image mirror

Copy and paste your frame & tube as new layer on this image

Place like mine, add drop-shadow

open the white frame i have supplied in psp

selections, select all, float, flood-fill with #B2C0CA

use the same Texture Effects as above,

select none, copy and paste on your tag as new layer

resize and place under your tube & frame

add drop-shadow

Now copy and paste the elements as new layers

I have colorized mine same setting as above for the beach template

Add slight drop-shadow as you go

Add your name and any copyrights to your tag

Layers, merge all

Now we going to make the frame

Image add borders, all on 1 with colour #3B5057

Image add borders, all on 20, colour white

Click inside of the white border with magic wand

In your colour pallette put the top colour on #B2C0CA

And your bottom colour on #6E858E

Effects, Filters Unlimited 2.0.. Gradients, Linear Duplex,

Keep selected

Effects, Texture effects, Weave, same settings as before

Adjust, sharpness, sharpen, add the same drop-shadow as before

Select none

Open the Pearl Corner Accents in psp, with your selection tool

Draw around the one you want to use

Copy and paste onto your tag as new layer

Image resize to your liking, place to the left of your tag

Layers, duplicate, image mirror, layers, duplicate image flip

Layers, duplicate image mirror

Add slight drop-shadow to all the layer & sharpen

Layers, merge all

Resize to your liking, save as....

Thanks for doing my tutorial

Gaylene

xox

Thursday, May 14, 2009

Amber Spice..


Click on tag to see full size...

This tutorial was written by me on May 15th 2009

Please don't copy it and claim as your own


Supplies needed

Tube

Scrap-kit

Mask


Plugins I used... DSB Flux.. Blast

Cybia..Screenworks..Light Gauze


The scrap-kit Amber Spice PTU from Heart & Soul Creations

Purchase HERE


The tube I have used is a PTU from Barbara Jenson

Purchase HERE


SUPPLIES


I have included the 2 background images in my supplies

As I made the tag this morning and can't remember how I did it pmpl...

If you want a challenge just look at my images 1 & 2 and try to make them lol

This tutorial is a quick one just copy and pasting


Open my image 1 & 2 in psp

Copy and paste image 2 on image 1

Open wire 3 in psp, copy and paste on your tag as new layer

You will need to duplicate the wire to make it fit along the top of your tag

When you have finished merge all the layers together

Now drag the merged layer down so it's under image 2

Layers, duplicate, image flip

Do the same for the side when you have finished duplicating

Merge them, then duplicate, then mirror

Now merge all of the wire layers together

Layers, Properties, put the Opacity on 42, click ok

See my tag for reference

Copy and paste the frame as a new layer, resize to your liking

Open a paper of choice in psp, copy and paste as new layer resize the paper

So it fits in the frame drag this layer under the frame

Add drop-shadow to the frame and sharpen

Iv'e add a brush also on the paper and some writing

You can put what you want in there

Copy and paste what elements you want on your tag

I used my freehand selection tool around the flowers

Then copy and pasted them on my tag at the bottom

Add dropshadow to your elements

Add your name and any copyrights to your tag

Layers, merge all

Save

Tuesday, May 12, 2009

Blue For You...


Click on tag to enlarge

I wrote this tutorial on May 13th 2009
Any similarity to any other tutorial is purely coincidental
This tutorial was written in psp8 but should work in other versions.

Hope someone will do this tutorial lmao wanted to do something

Different for you all, I think it's ok what you think?

I have so much saved that I have collected over the years

If any of the things I have used are yours please let me know so I can give you credit for them


All the tubes I have used are in the supplies except for the Elias Tube

You must have a license to use his art-work

Purchase them HERE


SUPPLIES


Put the mask hjr_mask_curves 1 in your psp mask folder


Open new white image 700x600

Layers, new raster layer, floodfill with #B3D4E2

Layers, load, save mask from disc, find the mask I supplied click ok

Layers, merge group

Layers, merge all

Image add border put all on 3 and colour on #85BACD

Image add borders 3 again with colour #C3C5C6

Repeat the first border again

Now open a new white image 600x500

Layers new raster layer, floodfill with the same colour

Layers, load, save mask from disc, find the mask I supplied click ok

Layers, merge all

Add the borders to this one same steps as above

Now copy and paste this image on your other image

Add drop-shadow settings below

V&H on 3

Opacity on 70

Blur on 15

Black

Now change the V&H to -3

And do the drop-shadow again

Layers, merge all

Copy and paste bfu 2 as new layer, using your deform tool

Carefully pull out to the edges see my tag for reference if you want & sharpen

Copy and paste bfu 1 as new layer resize a little if you want

Drag this layer under the bfu 2 layer

Copy and paste bfu 7 as new layer place on the edge of the inner image

Layers, duplicate, image mirror

Layers, duplicate, image rotate 90 to the left place on the top of the image

Layers, duplicate, image flip, merge these layers together

Erase any parts on the corners that are over-lapping

Add slight drop-shadow and sharpen

Now copy and paste the other tubes as new layers

Resize if you have to and add drop-shadow & sharpen as you go

Copy and paste the word-art I have made & supplied as new layer

Place where desired

Add your name & any copyrights to your tag

Layers, merge all, resize if you want to

Save

Thanks so much for taking the time to so my tutorial

Gaylene