Please leave a little thank you...

If you do any of my tutorials could you please leave me a little message in the shoutbox i would like to hear what you think of them also would love to see your results you can email them to me my email addy is at the bottom of my terms of use.. thanks...

Tuesday, April 28, 2009

Teen Love 2....


Click on tag to see full size..

This tutorial was written by me on April 28th 2009
Any similarity to any other tutorial is purely coincidental
This tutorial was written in psp8 but should work in other versions.

Tools needed
Tube
Scrap-kit
Mask

Plugin .... Effects Cybia..Screenworks Fine Rule

Scrap-kit.. Teen Love PTU from Missy at Scraps With Attitude
You can purchase the kit HERE
This is the 2nd tutorial made with this kit..

I am using the artwork of Jamie Kidd
As this is a PTU tube I can't supply it
You can purchase the tube HERE

The mask I used is EBD Mask 7

I can't remember where I got this mask from if it's yours
Please let me know and I will give proper credit it's in my supplies

Open new transparent image 700x580
Floodfill with white
Open Tammys Scraps_Frame 2 in psp
Copy and paste as new layer, image resize 23%
See my tag for placement
Layers, duplicate, make the original frame active
Adjust, blur, gaussian blur, put the radius on 15, click ok
Add drop-shadow settings below
V&H...2
Opacity..50
Blur...7
Black
Effects Cybia..Screenworks Fine Rule mode on 0
Make the top layer active now
Copy and paste Tammys Scraps_Frame 3 as new layer
Image resize 20%, place like mine on the tag
Click inside of the frame rectangles with your magic wand
Selections, modify, expand by 10
Open Teen Love Tammys Scraps_Paper 15 in psp
Image resize 20%, copy and paste as new layer on your tag
Now place the paper in the frames so that you see the writing
Selections, invert, hit delete on your keyboard
Select none
Open Teen Love_Curly Ribbon 2 in psp
Copy and paste as new layer on your tag
Image resize 10% all layers not clicked
Place on the heart frame see my tag for placement
Layers, duplicate place on the other frame see above
Add drop-shadow to both ribbons and sharpen
Open Tammys Scraps_Bow 6 in psp
Copy and paste as new layer
Image resize 8%, image mirror, place like mine on the left frame
Layers, duplicate, place on the right frame like mine
Add drop-shadow and sharpen
Copy and paste your tube as new layer
Place where you want you can move it later if you have to
Add drop-shadow settings above
Now copy and paste what elements you want on your tag
Adding drop-shadow to each layer as you go
When finished make the background layer active
Layers, new raster layer, floodfill with a colour from your tube
Layers, load save mask from disc
Find the mask you want to use click load
Layers, merge group
Add your name and any copyrights
Layers, merge all
Save as...

Monday, April 27, 2009

Teen Love...


Click on tag to see full size..

This tutorial was written by me on April 28th 2009
Any similarity to any other tutorial is purely coincidental
This tutorial was written in psp8 but should work in other versions.

Tools needed
Tube
Scrap-kit
Mask

Scrap-kit.. Teen Love PTU from Missy at Scraps With Attitude
You can purchase the kit HERE
It's an awesome kit & huge so i am going to make another tutorial with it.

The mask I have used is sg_floral-grungeframe 1
You can download the mask HERE
The mask is on page 21 of Essex Girl's masks

Put the mask in your psp mask folder

I have used the awesome artwork of Elias Chatzoudis
You must have a license to use his artwork
Purchase Elias tubes HERE

Plugin needed ... Cybia.. Screenworks

Now lets begin the tag..

Open new transparent image 650x650, floodfill with white
Layers, new raster layer, floodfill with black
Layers, load save mask from disc, find sg_floral-grungeframe 1
Load, layers, merge group
Open teen love_paper 11 in psp,
resize 650x650 pixels, all layers clicked
Copy and paste the paper as new layer
Repeat the mask again,
Image, mirror
Open Tammy's Scraps_Lace Heart 1 in psp
Image, resize 25%, copy and paste as new layer on your tag
Duplicate the lace heart, make the original layer active
Adjust, blur, gaussian blur, put the radius on 20, click ok
Add drop-shadow settings below
V&H...2
Opacity..50
blur...7
Black
Effects Cybia..Screenworks Fine Rule mode on 0
Make the top layer active now
Open Tammys Scraps_Ribbon & Bow 1 in psp
Image resize 15% copy and paste as new layer on your tag
See my tag for placement
With eraser tool carefully erase the over-lapping ribbon
Add drop-shadow same settings as above
Open Tammys Scraps_Sticker Wordart 3 in psp
Image resize 20%, copy and paste as new layer on your tag
Place where you want it & add drop-shadow
I also used my free hand selection tool and drew around the hearts
Then copy and pasted them on my tag and resized by 30%
Then added the same drop-shadow as above
Add what elements you want now to your tag
Adding a drop-shadow as you go and sharpen if you want
Now copy and paste your tube as new layer
Add drop-shadow and place where you want it
Don't forget to add your name and any copyrights to your tag
Add a border also if you want
Layers, merge all, save
Resize your tag if you want to
Thanks for doing my tutorial
Gaylene
xox

Thursday, April 23, 2009

Pastel Dawn....


Click on tag to see full size..

This tutorial was written by me on April 23rd 2009
Any similarity to any other tutorial is purely coincidental
This tutorial was written in psp8 but should work in other versions.

Tools needed
Tube of choice
Scrap-kit
Mask

Scrap-kit Pastel Dawn FTU from Kathleen aka Angel
Download HERE

The tube I have used is a PTU from Shawli
You must have a license to use this tube
You can purchase the tube HERE

The mask is from Vix called Vix_Mask 344
Download HERE

Put the mask in your psp mask folder


Open a new transparent image 650x650
floodfill with white, selections, select all
layers, new raster layer, copy and paste paper 2 into selection
select none
layers, load save mask from disc, find Vix_Mask 344, load
layers, merge group
Move the mask to the top left of your tag
And now duplicate, mirror and flip or what ever you like
Till you have 4 layers of the mask
Make the Copy of Group Raster 2 layer active
In your background colour palette put #E4456D
Close of your foreground colour
Get the OddBats font up, size 500 & do a capital N
Objects, Align, center in Canvas, convert to raster layer
With magic wand click inside of the 4 shapes
Selections, modify, expand by 2
Copy and paste paper of choice as new layer,selections, invert, delete
select none. Move this layer down one
Make the top layer active
Copy and paste pastel dawn 48 as new layer
Image resize 30% all layer not ticked
Place to the left of your tag see my tag for reference
Layers, duplicate, image mirror
Add drop-shadow and sharpen
Copy and paste tube of choice as new layer place where you want it
Add drop-shadow
Now add what elements you want on your tag
Adding a drop shadow to each one
Put your name and any copyrights on your tag
Layers, merge all
Save

Monday, April 20, 2009

Polka Dots & Flowers...


Click on tag to see full size..

This tutorial was written by me on April 20th 2009
Any similarity to any other tutorial is purely coincidental
This tutorial was written in psp8 but should work in other versions.

You will need the following

2 Tubes (one close up and one main tube)
Mask
Scrap-kit

The mask I have used is sg_flower-backed
Download HERE
It's on page 32 of her masks

Scrap-kit Polka Dots Hearts & Flowers FTU from Dianne
Thanks so much Dianne for the freebie kit it's fab
Download HERE

The tubes are PTU ones from Ismael Rac you need a license
to use these tubes Purchase from HERE

Plugin needed is...dsb flux..Linear Transmission

Put the mask in your psp masks folder

Ok lets begin...

Open new white image 700x580

Selections, select all, layers, new raster layer

Copy and paste the purple dots paper into selection, select none

Layers, load save mask from disc, find the mask, load

Layers, merge group

With magic wand click inside of the 4 small squares on the mask

Selections, modify, expand by 2, layers, new raster layer

Flood-fill with a silver gradient,

Copy and paste the purple beads into selection

Select none

Make the mask layer active

Do the same as above to the large rectangle on the mask use a different Gradient

But don't copy and paste the purple beads

Copy and paste the Purple circle frame as new layer

Click inside of the frame with magic wand

Selections, modify, expand by 4, layers new raster layer

Floodfill with a gradient, I used the same one that I used for the

Large rectangle, select none

Apply the dsb flux linear transmission default settings

Drag these 2 layers under the frame layer

Copy and paste the transparent tube as new layer

With eraser tool erase any of the tube outside of the frame

Copy and paste your main tube as new layer

Place where you want it, add drop-shadow to frame and the main tube

Copy and paste some elements as new layers

Adding a slight drop-shadow as you go and sharpen if you want

Add your name and any copyrights

Layers, merge all

Save

Thanks for doing my tutorial

Please leave a comment in my shout box

Gaylene

xox
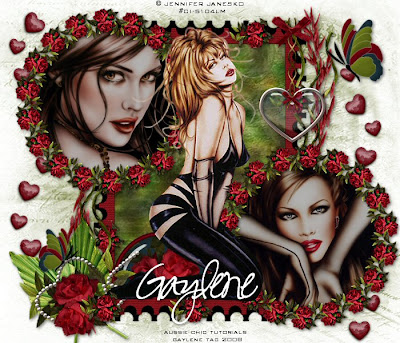
Saturday, April 18, 2009

Red Roses...


Click on tag to enlarge

I wrote this tutorial on April 19th 2009

Any similarity to any other tutorial is purely coincidental
This tutorial was written in psp8 but should work in other versions.

You will need the following

Tubes (3 from the Same artist)
Mask of your choice
Scrap-kit

Scrap-kit Roses FTU from Vaybs

Download HERE

Scroll down the page.

The tubes I am using are PTU from Jennifer Janesko

You must have a license to use her artwork

You can purchase them from HERE


Open new white image 700x580

Selections, select all, layers, new raster layer

Copy and paste paper 2 into selection, select none

Layers, load save mask from disc, find a mask of your choice, load

Layers, merge group

Copy and paste frame 1 as new layer

Selections, select all,float,defloat

Layers, new raster layer, floodfill black

Select none

Copy and paste the frame again as new layer

Image, resize 95%,

Repeat above steps but floodfill with #81151C

I also added Cybia, Screenworks, Fine Rule to mine

Click inside of frame with magic wand

Selections, modify, expand by 6, copy and paste paper 2 as new layer

Selections, invert, hit delete on keyboard

Select none

I added some Eye Candy 4000, Gradient Glow also

Drag this layer below the frame layer

Make the top layer active

Copy and paste frame 3 as new layer

Image resize 55%, layers, duplicate

Place the 2 frames on your tag see mine for reference

Click inside one of the frames with magic wand make sure

You have that frame layer active though

Selections, modify, expand by 6

Copy and paste one of your tubes as a new layer

Place where you want it in the frame, selections, invert

Then hit delete, select none, drag this layer under the frame layer

Layers, merge down

Now do the same to the other frame layer

Add slight drop-shadow to all the frames now

Copy and paste your main tube as new layer

Add drop-shadow

Now copy and paste what elements you want to use

Adding drop-shadow as you go

Add your name and any copyrights

Layers, merge all

Save

oxo
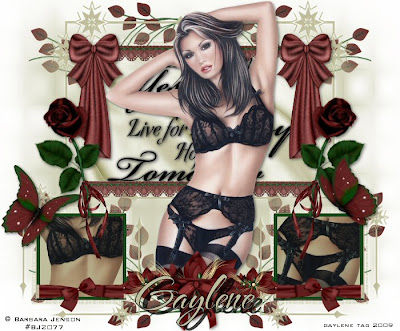
Wednesday, April 15, 2009

Deep Rich Roses...


Click on tag to enlarge

I wrote this tutorial on April 16th 2009
Any similarity to any other tutorial is purely coincidental
This tutorial was written in psp8 but should work in other versions.

You will need the following

Tube
mask
scrap-kit
Satin pattern in supplies

SUPPLIES

The tube i am using is a PTU one from Barbara Jenson
you must have a licence to use it
Purchase from HERE

Scrap-kit Deep Rich Roses PTU from LadyAnne's Inzpired Dezignz

You can purchase HERE

The Mask i used is sg_starstruck from Essex Girl
download HERE
it's on page 31 of her masks

Put the mask in your psp masks folder
and the pattern i have supplied in your patterns folder in psp

Open new white image 700x580
layers, new raster layer, floodfill with #BFBE9B
Layers, load save mask from disc, find the mask
Click ok, layers, merge group
layers, duplicate, layers, merge down
with Selection tool set to rectangle draw just inside of top frame on the mask
layers, new raster layer
open your patterns and floodfill with the satin pattern i supplied
adjust, Hue & Saturation, Colorize with settings below
Hue on 40
Saturation on 56
click ok
selections, select none
layers, merge down
open element 51 in psp, copy and paste as new layer
image resize 50% , image mirror, image flip
place to the top left of your tag see my tag for reference
layers, duplicate, image mirror
layers, merge down
duplicate again, then flip
layers, merge down
now drag this layer below your mask layer
add some word-art to your top frame if you want now
make the top layer active
open element 20 the frame in psp
copy and paste as new layer, image resize 40%
place on the left small frame of the mask
with your deform tool carefully make it fit properly
see my tag for reference
layers, duplicate, image mirror
get your selection tool again and draw a rectangle on the left frame
draw on the green border of the frame
make sure you have that layer active
open your tube in psp
copy and paste as new layer
place in the frame, selections, invert, the hit delete on the keyboard
selections, none
layers, Properties, put the blend mode on Multiply click ok
now do the same to the other small frame
copy and paste your tube as new layer
add drop-shadow
place in the middle of your mask
now copy and paste what elements you want as new layers on your tag
adding a drop-shadow as you go
when finished add your name and any copyrights
layers, merge all
save

thanks for doing my tutorial
Gaylene
xox

Monday, April 13, 2009

Party Girl...


Click on tag to see full size..

This tutorial was written by me on April 14th 2009
Any similarity to any other tutorial is purely coincidental
This tutorial was written in psp8 but should work in other versions.

You will need the following

2 Tubes (one close up and one main tube)
Mask
Scrap-kit

Scrap-kit CLUB.. FTU from Bluey
Download HERE

The tubes I am using is a PTU from Ismael Rac
You must have a licence to use this tube
Purchase from HERE

The mask I have used is WSL_Mask 192
Download from HERE

Open new white image 600x600
Copy and paste paper 1 as new layer
Layers, load save mask from disc find the mask
Load, layers, merge group
Copy and paste frame 1 as new layer
Image resize 80%
Copy and paste frame 2 as new layer
Image resize 75%
Copy and paste frame 1 again as new layer
Image resize 70%
Merge all the frame layers visable
Click inside of the frames with magic wand
Selections, modify, expand by 6
Copy and paste paper 7 as new layer
Selections, invert, and hit delete on your keyboard
Selections, none
Copy and paste tube of choice and place in the frame
Add drop-shadow to the frame layer
Adjust, sharpness, sharpen
Make the top layer active
Copy and paste your main tube as new layer
Add drop-shadow
Now copy and paste what elements you want to use as new layers
Add drop-shadow and sharpen if you want to
When finished add your name and any copyrights to your tag
Layers, merge all
Save

Thursday, April 9, 2009

Beauty in Black...


Click on tag to see full size..

This tutorial was written by me on April 10th 2009
Any similarity to any other tutorial is purely coincidental
This tutorial was written in psp8 but should work in other versions.

Tools needed
2 Tubes.. One a close up
Scrap-kit
Mask of choice
Template

Template 50 by Ali download HERE

Scrap-kit Country Delight FTU from Cinnamon Scraps
Download HERE

The tube i have used is a PTU from Ismael Rac.
You can purchase the tube HERE

The word-art I have used I don't know where I got it from
If this is yours please let me know I will give proper credit for it
I tried to Google for it..
Download HERE

Open the template in psp, windows, duplicate, delete the top layer
Close the original Template we don't need it now
Make the top layer active, layers, new raster layer
Flood-fill with white, layers, arrange send to bottom
Copy and paste paper of choice as new layer
I used paper 23
Apply mask of choice, layers, merge group
I used WSL_Mask 206, I also resized my mask layer 110%
I added some bright noise to the mask layer also
Make the back rectangle layer active
Copy and paste paper of choice as new layer, selections, invert
Hit delete, select none, delete the template layer
Add slight drop-shadow to your layer
Do the above to all the other template layers
But don't do the back frame layer we will do that one last
Ok make the back frame layer active do the same as above but
Copy and paste your close up tube as new layer
Selections, invert, hit delete, select none
Now merge all the template layers visible
Copy and paste what elements you want to use as new layers
Add slight drop-shadow to each layer as you go
Copy and paste your main tubes as new layer
Add drop-shadow
Add the word-art I have supplied
Add drop-shadow to it
Add your name and any copyrights
Layers, merge all
Save
Thanks for doing my tutorial
Gaylene

Remember Me....


Click on tag to see full size..

This tutorial was written by me on April 10th 2009
Any similarity to any other tutorial is purely coincidental
This tutorial was written in psp8 but should work in other versions.

Tools needed
Tube
Scrap-kit
Mask

Scrap-kit Remember Me FTU from Bea
She has deleted her blog so i have put the elements i used in the supplies
Download HERE

The tube I have used is a PTU one from Barbara Jenson
You can purchase from HERE
You must have a licence to use her tubes

The mask I have used is WSL_Mask 116
Download from HERE

Put the mask in your psp mask folder

Plugin..Cybia.. Screenworks

Open new white image 700x580
Copy and paste paper of choice as new layer
Layers, load save mask from disc find the mask
Load, layers, merge group
Adjust, blur, Gaussian Blur 7
Effects, Cybia, Screenworks, Fine Rule
Mode on 0, click ok
I added the mask again but used a pattern
Just experiment a bit, then resize it by 95%
Copy and paste Journal 2 as new layer
Move it to the top of your tag
Layers, duplicate, image, flip
Move this layer down a little see my tag for reference
Now get your eraser and carefully erase a little where it joins
Copy and paste frame 2 as new layer
Image, rotate, free rotate 90 degree's right
All layers not clicked. Image mirror
Open heart3 in psp, go to patterns and find it in there
Put angle on 0 and scale on 20
Layers, new raster layer, floodfill with heart
Select none, drag this layer under the frame layer
Make the top layer active
Copy and paste your tube as new layer
Now duplicate your frame layer and drag it above the tube layer
Erase what parts you want to
Now add what elements you want on your tag
Adding a slight drop-shadow as you go
When finished add your name and any copyrights
Layers, merge all
Save
Thanks for doing my tutorial
Gaylene

Secret Garden...


Click on tag to see full size..

This tutorial was written by me on April 10th 2009
Any similarity to any other tutorial is purely coincidental
This tutorial was written in psp8 but should work in other versions.

Tools needed
Tube
Scrap-kit
Mask

Scrap-kit Secret Garden PTU from CBJ Creationz
Purchase from HERE

The tube I have used is a PTU one from Jasmine Becket-Griffith
You can purchase from HERE
You must have a licence to use her tubes

The mask I have used is zuzzanna_mask 7
Download from HERE

Put the mask in your psp mask folder

The font I used is Inoxida

Plugin..Cybia.. Screenworks (optional)

This tutorial is easy mainly just copying & pasting

Open new white image 700x580
Copy and paste paper 3 as new layer
Layers, load save mask from disc
Find the mask
Click load, layers merge group
Effects, Cybia, Screenworks, fine rule
Mode on 0, click ok
Copy and paste frame 2 as new layer
Image resize 50%
Click inside of frame with magic wand
Make sure you go right to the edges
Selections,modify, expand by 6
Layers, new raster layer,copy and paste paper of choice into selection
Select none, drag this layer under the frame layer
Merge these layers visible
Image, rotate, free rotate 10 to the right
All layers not clicked
Copy and paste the frame again as new layer
Repeat above steps but don't merge or rotate the frame yet
Copy and paste your tube as new layer
Image resize to your liking
Place in the frame add slight drop-shadow
Now merge these layers visible
Image, rotate, free rotate 10 to the left
Add the Fine Rule if you want to
Copy and paste your tube again as new layer
Place where you want it
Add drop-shadow
Now copy and paste what elements you want to use
I've add a drop-shadow on the bird settings below
V...7
H...13
Opacity...75
Blur...1
Black
Write your name on your tag and any copyrights
I added the same drop-shadow as above to my name
Layers, merge all
Save

Monday, April 6, 2009

Award from Nae, Thanks hun...


Thanks so much Nae for this award
you can visit Nae HERE
she had the most awesome blog...

I have to pass this award onto 3 blogs
and i choose..

1.. Marie

2..Lilli

3..Molly

There are so many blogs that deserve this award
hugs Gaylene
xox