Please leave a little thank you...

If you do any of my tutorials could you please leave me a little message in the shoutbox i would like to hear what you think of them also would love to see your results you can email them to me my email addy is at the bottom of my terms of use.. thanks...

Sunday, May 30, 2010

Hi all.........

Hi there i am sorry i havn't been on here for a few months but my computer is kaput so i can't do any more tutorials, also if any of the links are not working i can't do anything about that. I am on my daughters comp at the moment and she doesn't have psp on here so i hope they can fix mine ... Take care all hugs from me....

Thursday, March 18, 2010

Gaylene's updates

Hello I am writing this for Gaylene as she can not access her blog from her daughters computer.
Her computer is down at the moment.
So until further notice no updates will be written.She is going on a cruise in may so no updates until around June fingers crossed!
Thank you
She can still check her messages so feel free to leave one!

Friday, February 26, 2010

Punky Butts....


Click on tag to see full size...

This tutorial was written by me

I hope I can remember how I made it lol

Well here goes...

What you will need.

Tube

Template 33

Scrap-kit

Mask

plugins...optional.

Tramages... Tow the line & Alien Xenofex,.. Constellation

The tube I have used is from Barbara Jensen it's a freebie

Download HERE


Template 33 is from Punky Butts

She has wicked Templates thanks Hun


The mask sg_ geometric-grunge frame 1 from Essex Girl

Download HERE

Put the mask in your psp mask folder


Scrap-kit FTU Lacarolita_Oh my Heart from Lacarolita's Designz


Open the template in psp, window, duplicate close the original
Then delete the top layer
Make the rectangle layer active, selections, select all, float then defloat
Copy and paste paper of choice as new layer
Selections, invert then hit delete on your key-board, select none
Add drop-shadow if you want
Work your way up the layers repeating same as above
I didn't use the film strips choice is your's
In the circles & stars I used a gold gradient instead of a paper
Also in the circle layer I added a background
And in the small circles I used Tramages..Tow the line plugin
And some Constellation,default settings
I also used constellation in the stars
Add what elements you want to use add drop-shadow
Copy and paste your tube of choice add drop-shadow
unlock the white back-ground layer it's the 1st layer
in your layer palette
layers, new raste layer, flood-fill with colour of choice
or a paper
Layers, load, save mask from disc, find the mask
Click load, layers, merge group
I have added a couple of doodles in the corners also
Write your name on the tag & any copyrights
Image add borders size 2 in black
Image add borders 20 in white, click inside of border with magic wand
Image, reflection effects, kaleidoscope with settings below
Everything on 0 except number of pedals on 10
Click wrap then click ok
Selections, none
Image, add borders size 2 colour black
Save as...
Thanks for doing my tutorial
Gaylene
xox

Monday, February 22, 2010

Tayla's Country...

Click tag to see full size.

This tutorial was written by me
Any similarity to any other tutorial is purely coincidental
This tutorial was written in psp8 but should work in other versions.
Tools needed
Tube of choice
Scrap-kit
Mask WSL_mask59 download HERE

SUPPLIES

Put the mask in your psp mask folder

Scrap-kit Taylas Country freebie by Nattys Scraps
Nat has deleted her blog, she has given me permission
to put the link in here.

The tube I am using is a PTU tube from Angels Tubes

http://angelstubes.com/

Open new white image 700x600

Copy and paste paper 2 as new layer

Layers,load save mask from disc find WSL_mask4
Load,layers merge group
Use your deform tool and pull the mask out to fit your tag
Open frame 2 in psp
Image resize 20% copy and paste as new layer
Copy and paste background blue I have supplies as new layer
Drag below the frame layer
Erase parts that over-lap the frame
Copy and paste tube of choice as new layer
Place where desired add drop-shadow
Open the butterfly in psp
Image resize 10%
Copy and paste as new layer
Place on the frame top right
Add drop-shadow and sharpen
Add what elements you want to
Add your name and any copyrights
Layers merge all
Save
Add some animation if you want
I've added a butterfly to my tag
Thanks for doing my tutorial
Gaylene


Thursday, February 11, 2010

Broken Love...


Click tag to enlarge & see animation

This tutorial was written by Gaylene
Any similarity to any other tutorial is purely coincidental
This tutorial was written in psp 8 but should work in other versions.
This tutorial is quick and easy.
Tools needed
Tube of choice
Scrap-kit
Mask of choice
Tear drops

Scrap-kit Broken Love freebie from Gigglygirlscrapz

download the kit HERE
Krissy has given me permission for you to download it
her blog is HERE she has gorgeous scrap-kits

I'm using a Mika Jelina tube as this is a PTU tube
I can't supply it sorry.
You can purchase the tube from CILM

Open new white image 700x580
Layer new rater layer
Floodfill with #CAB6B6
Layers, load save mask from disc find mask of choice
Layers merge group
Copy and paste frame 2 as new layer
With selection tool set at rectangle draw 2 rectangles
On the black borders of the frames layers new raster layer
Now flood-fill with #945C27 or colour of choice
Select none, drag this layer under the frame layer
Add some effects to this layer if you want
I added some below is what I did
Effects, texture effects, weave
Gap 1
Width 3
Opacity 1
Colour black for both
Fill gaps clicked
Copy and paste your tube as new layer
Place on the right frame, now duplicate the frame
Drag this layer to the top and erase part of the frame
Covering the tube see my tag for reference
Drop shadow the tube
Make top layer active
Copy and paste journalling 1 as new layer
Image resize 80%.
Image rotate free rotate 25 to the left
Drag this layer down to above the mask layer
Layer duplicate, image mirror now drag it up behind the tube
See tag for placement
Copy and paste quote 1 as new layer
Image resize 60%
Place in the top frame
Add any elements you want to
Add slight drop-shadow if you want
Add your name and any copyrights
If you not going to animate
Layers merge all
Save

ANIMATION

Copy merge your tag and paste in AS as new animation
Open the tear drop in AS
As the tear drop has 4 frames we have to have 4 frames
On your tag so left click on your tag
Then right click and duplicate selected
Do this till you have 4 frames
Pull the scroll bar down on your tag
And make sure you only have 4 frames
Make your tear drops active(click in the first frame)
Edit, select all,edit copy
Now back to your tag, edit select all,
edit and paste into selected frame
Make sure you keep your mouse down
Now put the tear drop where you want
Release mouse,
Click on the view animation to see if its
Animated ok, if so click on view animation again
Now to slow the rears down as they are to fast
Edit select all, animation frame properties
Put it on about 30
Click view animation again to see if its ok
If all ok you can save now
And your finished.
Thanks for doing my tut
Gaylene


Monday, January 4, 2010

Sweet Spring..


Click tag to see full size..

This tutorial was written by Gaylene
Any similarity to any other tutorial is purely coincidental
This tutorial was written in psp8 but should work in other versions.
This is a very simple and easy tutorial

Tools needed
Tube
Scrap-kit
Mask sg_braided-star from Essex Girl
Word-art of choice

download HERE

Put the mask in your psp mask folder


Scrap-kit Sweet Spring is a PTU scrap from Jessica
You can purchase it from below
I am using a Rachel Tallamy tube its a PTU tube
So I can't supply it.

Open new white image 650x650
Copy and paste paper 18 as new layer
Layers,load save mask from disk find sg_braided star
Load, layers merge group
Copy and paste frame 3 as new layer, resize 90%
Adjust,Hue and Saturation, colourize
Hue...161
Saturation...147
Click inside of frame with magic wand
Selections, modify expand by 3
Copy and paste paper 23 as new layer
Selections invert and hit delete on keyboard
Select none
Move this layer under the frame layer
Copy and paste crochet lace as new layer
I used the deform tool to pull it outside the frame
Drag this layer under the frame layer and sharpen
Copy and paste pink flowers 2 as new layer
Image resize 50% place in the frame
Duplicate and mirror if you want I did
Copy and paste as new layer flower ribbon
Image resize 70%
Place on top of the frame
Layers duplicate, image flip
Now add drop-shadow to frame,paper and flower ribbon
V&H...3
Opacity...50
Blur...6
Black
Sharpen the layers also
Copy and paste white-pink ribbon as new layer
Image resize 50%, image flip
Place top right of frame, layers duplicate,image mirror
Place bottom left of frame
Sharpen both ribbons
Copy and paste as new layer butterfly 3
Image resize 40%
Place top left of the frame
Add drop shadow and sharpen
Duplicate image mirror and resize 60%
Place top right of your tag
Add what other elements you want
Add the word-art
Add your name and any CR
Layers merge all
Save
Thanks for doing my tutorial
Gaylene

Grand Opening...Tut Stop....


Tut Stop
Grand Opening


The goal of Tut Stop is twofold. We wanted to provide a service for both tutorial writers looking for an easy venue to advertise their new tuts, and for the traditional tagger to have "one stop shopping" when looking for a new tutorial to work on. Now both can come to one place….

Click on blinkie to join and don't forget to say that Gaylene.. from Aussie Chic Tutorials
sent you..


Friday, December 11, 2009

My Christmas Layout & Header...


Download HERE...

Happy Holidays Layout & Header...


Download HERE

Layout & Header....


If you want to use my Layout & Header you are most welcome
just click HERE to download it

Also i have the instructions in my list
how to add it to your blog

Gaylene
xox

I will be adding some more soon for you all to use..


Wednesday, October 7, 2009

Be Mine Tonight...


This tutorial was written by me..

Supplies you will need are...

Scrap-kit "Say You Will" FTU from Fantasy Moments

Thanks Sylvie for all your gorgeous free kits

The tube i have used is a Keith Garvey PTU tube

The mask i used is WSL_Mask 344 from Chelle

put the mask in your PSP Mask folder

Background of your choice

this tutorial is easy & quick just copy and pasting

Open new white image 700x580
layers, new raster layer
copy and paste paper of choice as new layer
layers, load save mask from disc find WSL_Mask 344
click load, layers merge group
copy and paste frame of choice as new layer
resize to your liking
click inside of the frame with magic wand
selections, modify, expand by 4
copy and paste your background as new layer
selections, invert, hit delete on your keyboard
selections, none
drag this layer under your frame layer
drop-shadow your frame layer
copy and paste your tube as new layer
place in the frame where you want it
now duplicate your frame layer then drag above your tube layer
now erase parts of the frame so some of the tube
is outside of the frame see my tag for reference
now copy and paste what elements you wish to use
adding a drop-shadow as you go
write what you want on your tag the font i used is LainieDaySH
add any copyright and your name
layers, merge all save as...

Thanks for doing my tutorial hope you had fun
hugs Gaylene
xox

Tuesday, October 6, 2009

Garv Girls...


Garv Girls

click on tag to enlarge..

This tutorial was written by me on October 7th 2009
Any similarity to any other tutorial is purely coincidental
This tutorial was written in psp8 but should work in other versions.

Tools needed

Scrap-kit Denise FTU from "Fantasy Moments"

download HERE

3 tubes from same artist..
I have used the art-work of Keith Garvey

Template 14 from Ali download HERE

Plugin needed...DSB Flux...Linear Transmission

Open the template in psp, window, duplicate close the original
Then delete the top layer
Make the doodle layer active, selections, select all, float then defloat
Copy and paste paper of choice as new layer
I used paper 19 on my tag
Selections, invert then hit delete on your key-board, select none
Add drop-shadow
Make the temp 3 layer active now
Selections, select all, float, defloat copy and paste another paper
I used paper 13 this time, selections, invert & delete, select none
Duplicate this layer then drag above the white background layer
Adjust, blur, gaussian blur, put radius on 10
Duplicate this layer, make the original layer active
Then Effects, dsb flux, linear transmission
Settings on..2..2..50 Vertical click then click ok
Make the other layer active same settings as above
But click Horizontal this time
I erased some of the outer but choice is yours
Now make the temp 2 layer active
Selections, select all, float, defloat, copy and paste paper as new layer
I used paper 16, selections, invert, delete, select none
Do the same as above with all the other template layers
Making sure you have the template layers active though
Ok now we add the close up tubes to your tag
Make the back frames layer active
Copy and paste both close up tubes as new layers
Place them in the frames where you want them
When you are satisfied with placements merge them together
Now make the back frame active again
Selections, select all, float, defloat, invert
Now make the merged close up layer active now hit delete
Select none
Make the back frames active again if your tubes don't fully
Cover the frames like mine
With magic wand click inside of both frames
Layers , new raster layer, flood-fill with colour of choice
Effects, texture effects, weave settings below
1..1..10.. Fill gaps ticked & both colours on black
Select none
Now make the outer frames layer active
Selections, select all, float, defloat copy and paste paper as new layer
I used paper 1, selections, invert, delete, select none
I have left the staples as is...
Copy and paste your main tube as new layer
Add drop-shadow
Now for the part I love doing
Copy and paste what elements you want on your tag
Adding a slight drop-shadow as you go
Add any copyrights & your name
Layers, merge all
Save as...

Monday, September 14, 2009

Sparkle Eye's


Sparkle Eyes

click on tag to see full size..

This is my 1st tutorial i wrote hope you enjoy doing it..

Supplies needed
Missy-Sparkle-Eyes Scrapkit FTU from
Misfits Scrapz

Download Scrap-kit Sparkle Eyes HERE

The link isn't in Missy's blog anymore

Tube of choice

I used the wonderful art of Keith Garvy please do not
use his art unless you have purchased a license to do so.

Font of choice

Mask WSL mask 11
Download.. HERE

Open 700x580 white canvas
Add new raster layer flood fill with A8D3E3
Layer load save mask from disc find WSL mask 11source luminance checked
Fit to layer and show all masks checked click load
Lagers merge group
I resized mine 110% make sure all layers is not ticked
Duplicate your mask layer
Open Missy frame 2 copy and paste as new layer resize
Copy and paste paper 1 as new layer move paper layer under the frame layer
Image rotate- free rotate right 5.00 click ok
Image resize 60% resize all layers not clicked move your paper a little to the right
Drop shadow the frame layer ajust sharpness sharpen
Copy and paste flower 2 resize and place on the frame
See my pic for reference add dropshadow and sharpen
Open bow 3 copy and paste as new layer resize and image flip
Sharpen then place on flower
Open gemstud 1 and 2 resize and place on the silver of the frame
Refer to my picture for placement merge the gemstud layers
Adjust sharpness sharpen add small dropshadow
Open glass heart 2 copy paste as new layer resize and place on frame sharpen
Activate your background layer layer new raster layer
Add some brushes of choice
Copy and paste your tube place where desired add drop-shadow
Add any copyrite and your name layers merge all flatten and save.
Hooray all finished

Thanks for trying my 1st tutorial hope you enjoyed doing it
Love Gaylene
xxx

Thursday, August 27, 2009

Hi all...


Hi all i am so sorry i havn't been in here for a while
but i just couldn't get in the mood for the computer but today
i was determined to do something in here, so i have made
a new layout with Gail's PTU kit Oriental Dreams
also my Header is from the same kit
you can purchase this gorgeous kit from
HERE

Also i will be doing a new Tutorial soon with a FTU kit
so keep an eye out this kit is awesome

catcha soon
hugs
Gaylene
xox

Monday, July 6, 2009

Dakota's Dream Tutorial...


Click on tag to see full size...

This tutorial was written by me on July 7th 2009

Please don't copy it and claim as your own


Supplies needed

Tube

Scrap-kit

Mask

Plugins needed...(Optional)
Tramages..Tow The Line
Xenofex..Constellation

Scrap-kit FTU Dakota's Dream made by me...
Download HERE

I only have the elements i used in the tutorial
when i got my comp fixed heaps of psp stuff got wiped out

The tube I have used is the gorgeous artwork from
Zindy Nielsen purchase from HERE

Mask i used is Zuzzanna-mask 60
Download HERE
it's the 9th mask down the page

Open new white image 650x650
Selections, select all, layers, new raster layer
Copy and paste paper 3 into selection, select none
Layers, load save mask from disc find the mask
Click ok, layers, merge group
with selection tool set to rectangle draw just inside
the large rectangle
layers, new raster layer, copy and paste paper 5 into selection
select none
Effects, Tramages, Tow the line use default settings
Copy and paste frame 3 as new layer
Image resize 110% 2 times, move slightly to the right
Add drop-shadow
Selection tool draw on the black inner border of the frame
Copy and paste background of choice as new layer
Selections, invert, delete, select none
Drag this layer below the frame layer
Make the mask layer active
Effects, Xenofex, Constellation, settings below
2,26,1,3,100,75,
Twinkle rotation, 45
Keep original image ticked
random seed on 5677, click ok
Make the top layer active
Copy and paste flowers 4 as new layer, image resize 95%
place to the left of tag see my tag for reference
drag this layer below your mask layer
layers, duplicate, image, mirror
With eraser tool erase the bottom branches sticking out below
add slight drop-shadow to both layers
copy and paste tube of choice as new layer
resize if you want and then add drop-shadow
now copy and paste what other elements you want on your tag
as new layers, adding slight drop-shadow as you go
when finished add your name and any copyrights
I wrote Dakota's Dream on mine
the font i used was AL Fantasy Type
Image, Picture frame, I used Corners Album, click ok
layers, merge all, resize if you want to
save as...
Thanks so much for doing my tutorial
hope you like the scrap-kit Dakota's Dream i made
Please leave me a comment if you download it
hugs Gaylene xox

Wednesday, June 24, 2009

Dakota's Dream Scrap-kit...


Whooo Hooo made this scrap-kit with nooooooo help lmao

Download HERE

Please leave me a comment if you download it
took me hours to make ....

thanks so much
Gaylene
xox


Sunday, June 21, 2009

Charlies Passion Scrap-kit......


I have finally had a go at making a Scrap-kit lmao
i just hope some-one downloads and uses it
below is a tag i made with it
will write the tutorial for it tomorrow night
as i am to lazy to do it now
Also a special thank you to Nat for her help lol

Download the kit HERE


Monday, June 15, 2009

Thanks Betsy...


Thanks so much Betsy for this gorgeous gift
hugs Gaylene xox

Wednesday, June 10, 2009

Sweet Rock...
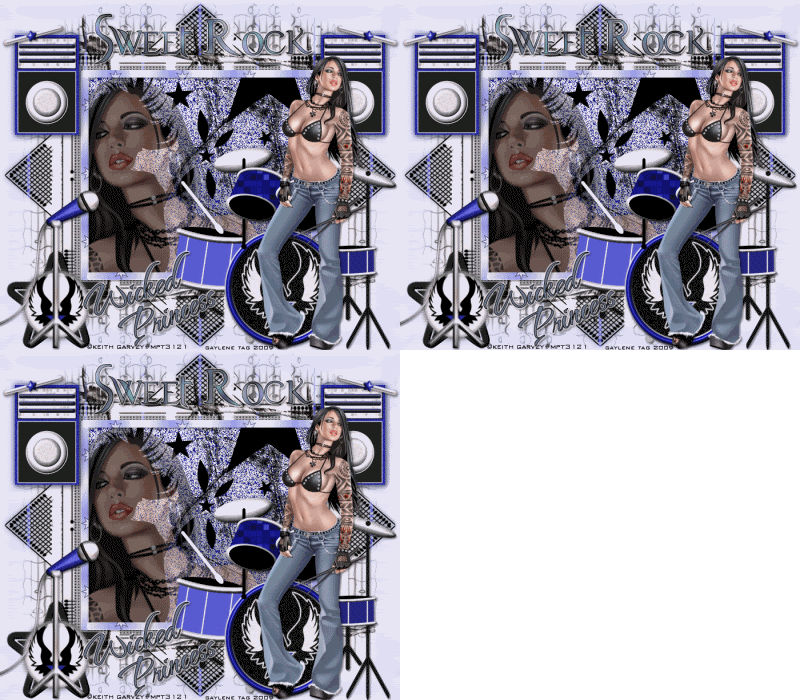

This tutorial was written by me on June 10th 2009
Any similarity to any other tutorial is purely coincidental
This tutorial was written in psp8 but should work in other versions.

Tools you will need...
1 Tube & 1 close up transparent tube from same artist
Mask
Scrap-kit

Plugin needed.. Eye Candy 5, Impact, Backlight
Cybia, ScreenWorks, Fine Rule

Scrap-kit Sweet Rock PTU from Wicked Princess
Purchase from HERE

The tubes I have used are PTU from Keith Garvey
Purchase from HERE

Mask sg_quilt-and-lattice from Essex Girl
Download HERE

Open new white image 700x600
selections, select all, layers, new raster layer
copy and paste paper 7 into selection, select none
Layers, load save mask from disc, find sg_quilt-and-lattice mask
load, layers, merge group, layers, duplicate
On the original mask layer Adjust, blur, gaussan blur on 5, click ok
Change the colours in your palette to..
Foreground..#BFBDF3
Background...#F6F6F6
Eye Candy 5, Impact, Backlight .. Click on colours
and make the colours the Same as your colour palette
leave all other setting as is.. Click Load
make the top mask layer active
Get your selection tool on rectangle
and draw around the large rectangle on the mask
copy and paste paper 19 as new layer, selections, invert
hit delete on your keyboard, select none
copy and paste your close up tube as new layer
place to the left see my tag for reference
Open tape 1 in psp, with your selection tool on rectangle
Draw a thin strip across half way through the first star
See my tag if you not sure what I mean lol
Copy and paste as new layer on your tag
Image resize 50%, place up top of your mask rectangle
Layers, duplicate, image flip
Layers, duplicate, image, rotate 90 degree's right
Place on the side, layers, duplicate, image mirror
You should now have a border around the mask rectangle
Copy and paste the drums as new layer
Image, resize 75%, place bottom right of the tag
Add drop-shadow
Copy and paste your main tube as new layer
Place in front of the drums & drop-shadow
Copy and paste speaker 1 as new layer, image resize 40%
Layers, duplicate, on the original speaker layer
Adjust, blur, gaussian blur 4 click ok
add Cybia, ScreenWorks, Fine-rule
merge these 2 layers visable, place top left on your tag
layers, duplicate, image mirror, Drag this layer
Under your tube layer
Copy and paste wire 2 as new layer, place up top of your tag
Drag this layer down so it's above your original mask layer
Layers, duplicate, image, flip
Copy and paste what other elements you want as new layers
Drop-shadow each layer as you go
Add your name and any copyrights to your tag
Layers, merge all
Save
I have added some animation to Sweet Rock also
Gaylene

Tuesday, June 9, 2009

Mariah...


Click on tag to enlarge

I wrote this tutorial on June 10th 2009
Any similarity to any other tutorial is purely coincidental
This tutorial was written in psp8 but should work in other versions.

Supplies needed..

Tube

Mask (in supplies)

Scrap-kit

Plugins needed...

DSB Flux.. Blast & Eye Candy 5, Impact, Perspective Shadow


Scrap-kit Mariah FTU from Bluedream Designs

Download HERE

Thanks Bluey for the freebie it's gorgeous


SUPPLIES


Mask I used is maskCris2

I can't remember where I got this mask from

If it's your please let me know & I will give proper credit for it.


Tube is from Keith Garvey it's PTU tube

Purchase from HERE


Open new white image 700x580

Selections, select all, layers, new raster layer

Copy and paste paper of choice into selection, select none

Layers, load save mask from disc, find maskCris2, load

Layers, merge group

Repeat the above but use a different paper

Then image, resize by about 95%

Copy and paste frame of choice as new layer

Image, resize about 70%

With deform tool carefully pull out to fit on the the mask

See my tag for placement

Click in the frame with magic wand

Selections, modify by 4, Copt and paste paper of choice as new layer

Selections, invert, hit delete on your keyboard

Select none, drag this layer under the frame layer

Make the white background layer active now

Copy and paste mesh 2 as new layer, move to the left

Layers, duplicate, image, mirror

Make the top layer active now

Copy and paste ribbon 1 as new layer, move up to the top

See my tag, drag this layer above your mesh layer

Layers, duplicate, image flip

Add drop-shadow and sharpen to both layers

Make the background layer in your frame active

Apply DSB Flux, Blast, apply all 4 directions and put

Percentage on 20, copy and paste your tube as new layer

Resize it so it fits in the frame, layers, properties

I put my Opacity on about 60' click ok

I also added some blinds choice is yours though

Now add some word-art of your choice

I've used some from Clareys Designz

Add drop-shadow to your frame, and word-art

Copy and paste your tube again as new layer

Place to the right of your tag & add drop-shadow

Copy and paste some elements as new layers

Adding a drop-shadow to these layers & sharpen

Add your name and any copyrights to your tag

Close of the white background layer, merge all the other layers visible

Now open your white background layer

Make the merged layer active

Now get the Eye Candy 5, Impact, Perspective Shadow up

Unclick the Reflect Selection Colour

Click on the little black arrow & make your foreground & background

Colours what you want, now click on the Reflect Selection Colour again

Click ok, layers, merge all, save as...

Add a border if you want also

Thanks so much for doing my tutorial

Gaylene